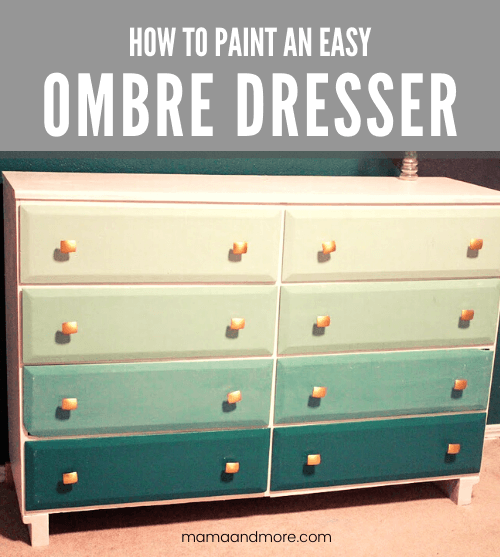
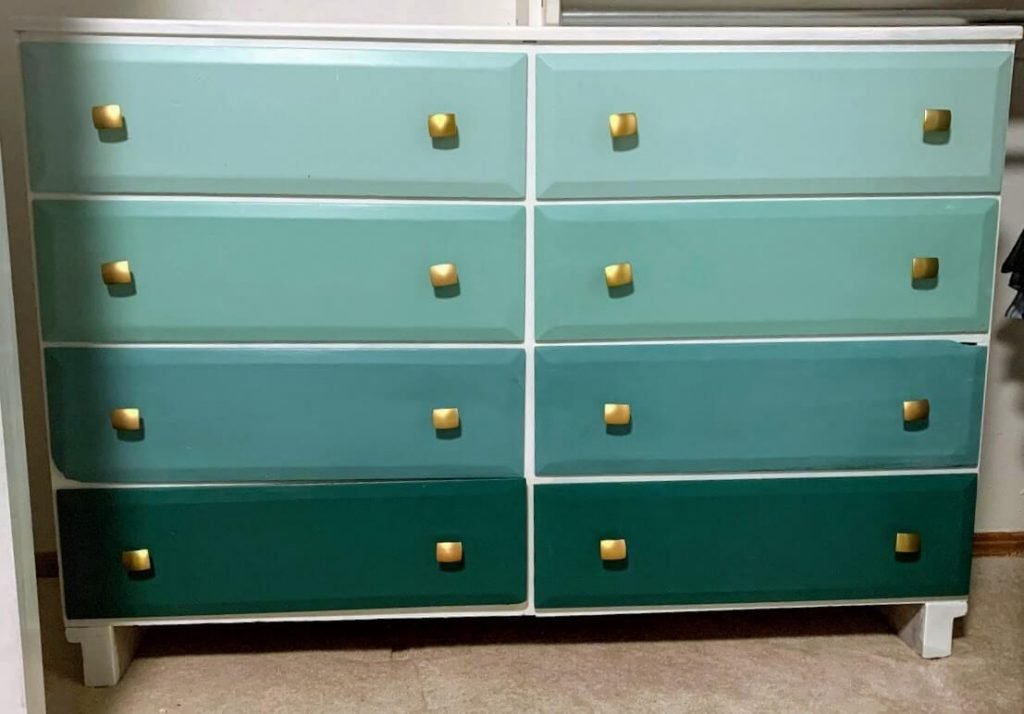
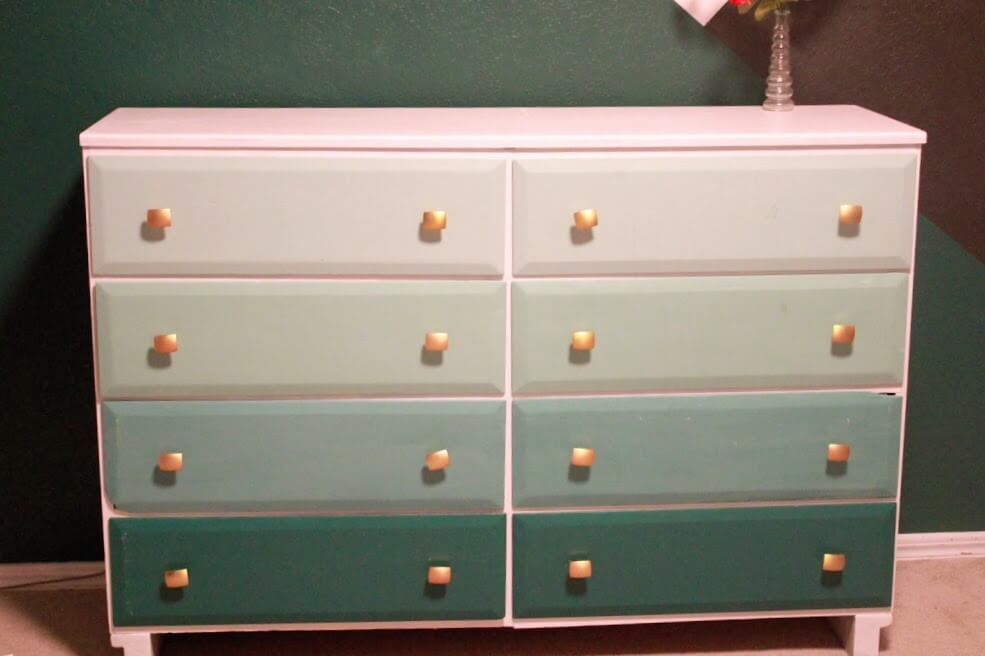
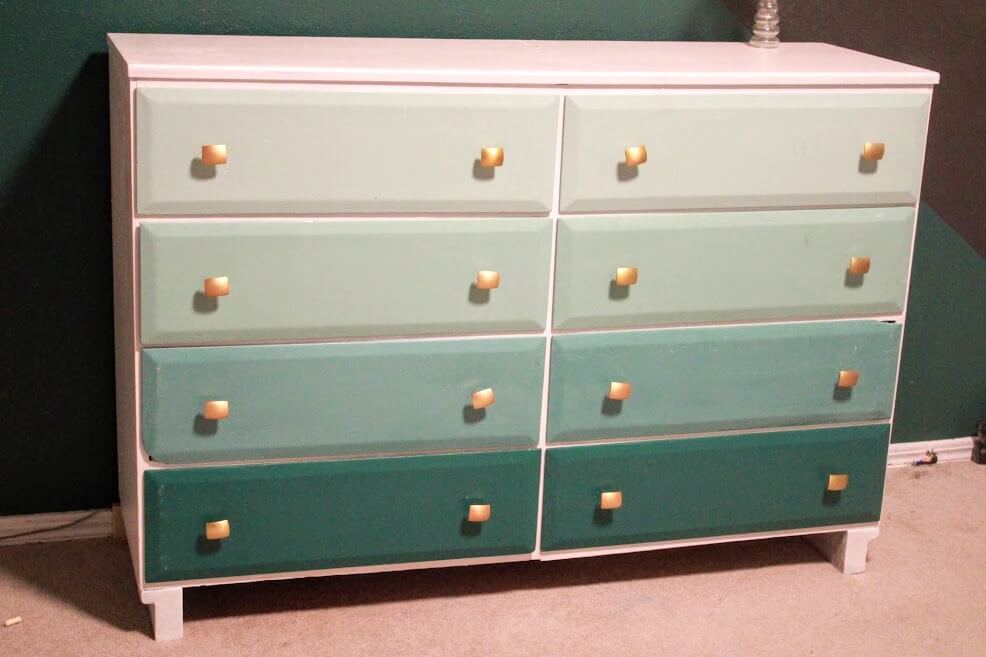
I have been eyeing up ombre dressers and furniture for YEARS. Now that I finally finished one, I don’t know what I was waiting for–this simple paint job took just a few hours and completely transformed an old dresser I found on the side of the road.
In fact, if you’ve never done a DIY project before at all and want to spend close to nothing–this is the project I’d suggest. It can be done with thrift store furniture, two $4 paint samples, and very few supplies. It’s super budget-friendly, easy, and quick.
Should I ombre everything in my house now? Probably.
Related: Want another way to make your home reflect YOU–for insanely cheap prices? Check out my printable wall art on Etsy in the Black Door Shop. You can even get 20% off your order with the code 20OFF. 🙂
Ready to get the steps to make your own ombre dresser magic? Read on for a step-by-step tutorial, or scroll to the bottom for a 1-minute video.
Supplies: Ombre Dresser
To make your DIY ombre dresser project as easy as possible, I’ve attached links to the materials on Home Depot, Lowe’s, and Amazon. Both Home Depot and Lowe’s offer online ordering and usually do same-day pickup.
Need more details on the best tools & supplies for your projects? Check my Incomplete List of the Best Tools & Supplies for DIYers. It includes ONLY tools & supplies that I’ve personally used and recommend, plus some honest notes about each product and what you really need (and don’t need).
- A dresser (ha)
- Basic cleaning supplies (I just used all-purpose spray and a paper towel)
- Orbital sander (might be optional): Home Depot | Lowe’s | Amazon | I bought this cheap sander from Walmart almost 2 years ago and it’s still going strong!
- Sandpaper (might be optional): Home Depot | Lowe’s | Amazon
- Paint: One primary color + white paint
- Paper cups or paint cups to mix: Amazon | Walmart
- Wooden stick (Yep, like even a paint stick will do here): Home Depot | Lowe’s
- Paint brushes: Home Depot | Lowe’s | Amazon
- Foam paint roller: Home Depot | Lowe’s | Amazon
- New drawer hardware (new hardware is optional): Mine are from Lowe’s
- Screwdriver for hardware: Home Depot | Lowe’s | Amazon
- Polycrylic sealer (optional): Lowe’s | Amazon
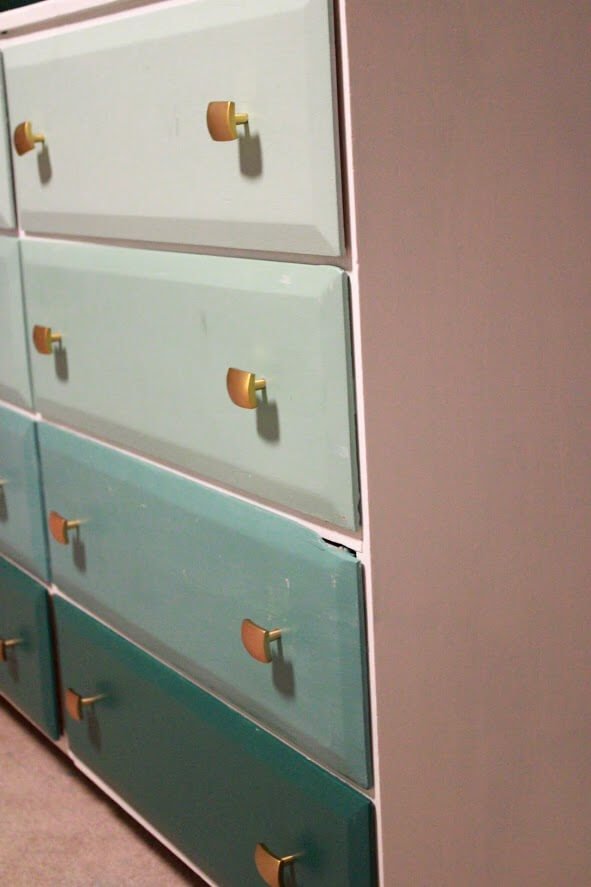
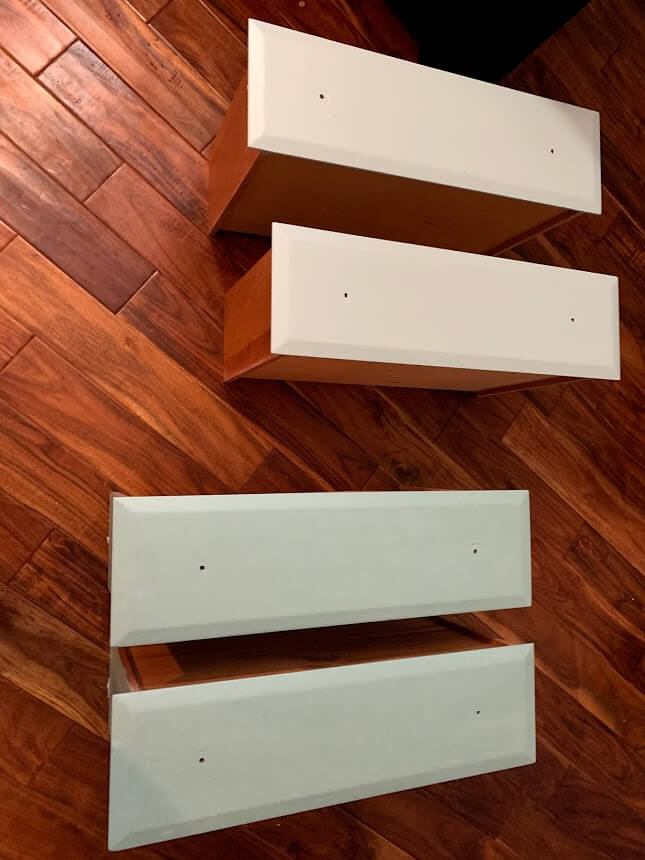
For my dresser, I made four ombre colors out of a small amount of green paint and white paint. I used good ol’ latex paint for this project because that’s what I have on hand, but you could easily do this with chalk paint as well.
Paint colors I used:
Capital green (Valspar)
Pure white (Valspar)
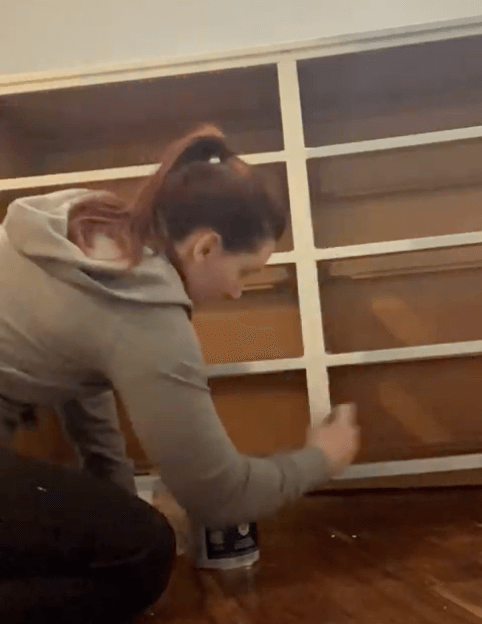
Step 1: Prep your Dresser

Ahh, prep work. It’s usually not a part that we absolutely love, but it is completely necessary for things to turn out well.
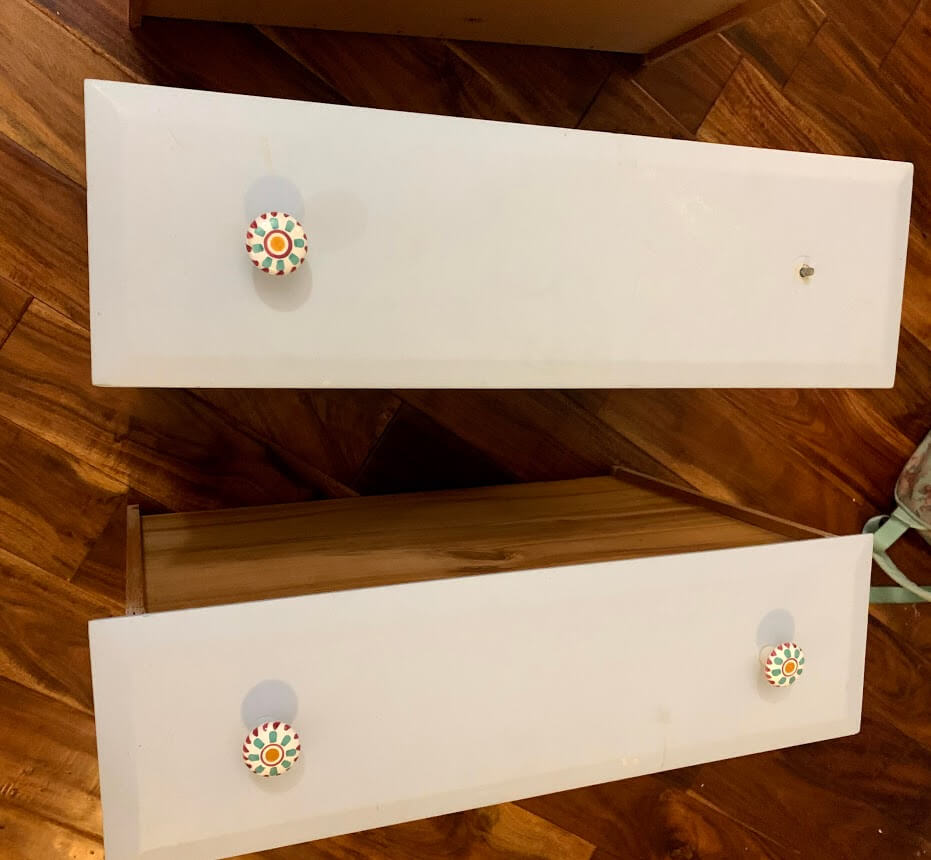
Luckily in this case, the prep work might be pretty dang easy. Simply unscrew the drawer pulls, take the drawers out, and then evaluate what needs to be done.
Not all dressers will need a full sanding and all the other stuff. However, if yours is from a thrift store or the side of the road like mine, it probably will need to be sanded.
Then, make sure you clean your dresser and check for anything else that needs to be repaired. Before I painted mine, I had to re-attach one of my drawer fronts. There were also some dents on the top, so I filled those with wood filler and sanded a few drip marks.
Most old dressers will at least need a quick sand where the old knobs were.
Then, after you clean, sand, and repair, your dresser is ready for paint! This is the fun part. 🙂
Step 2: Paint the Dresser Bones
Dresser bones? I’m sure that’s not the correct term. Maybe it’s called a dresser base? Well, you know what I mean.
And if you don’t, I mean this:
For my dresser, the “bones” were painted one solid color, so this was extremely quick and easy.
Of course, since you’re currently reading about an ombre dresser, you are probably a pretty creative and colorful person–so if you have your own idea, go for it! (And make sure you send it to me so I can gush over it too.)
You can use a paintbrush for this, but the best way to make sure the texture is smooth and streak-free is by going over it with your foam roller.
I won’t lie to you, some foam rollers are kind of awful to work with. It feels like some of them act like sponges and soak up the paint instead of smoothing it on. I also had a foam roller at one point that didn’t roll well–and let me tell you, I’m not sure there’s a quicker way for me to get frustrated ON THIS PLANET.
When I figure out a specific foam roller brand that works well, I’ll let you know. ANYWAY.
Depending on your dresser and your paint, you might have to do multiple coats. For furniture projects, I pretty much always plan on doing at least two coats.
Related: If you want another fun and easy paint project, make sure to read my post on how to paint a vase!
Step 3: Mix Paint
This is why you really came to this article, isn’t it?
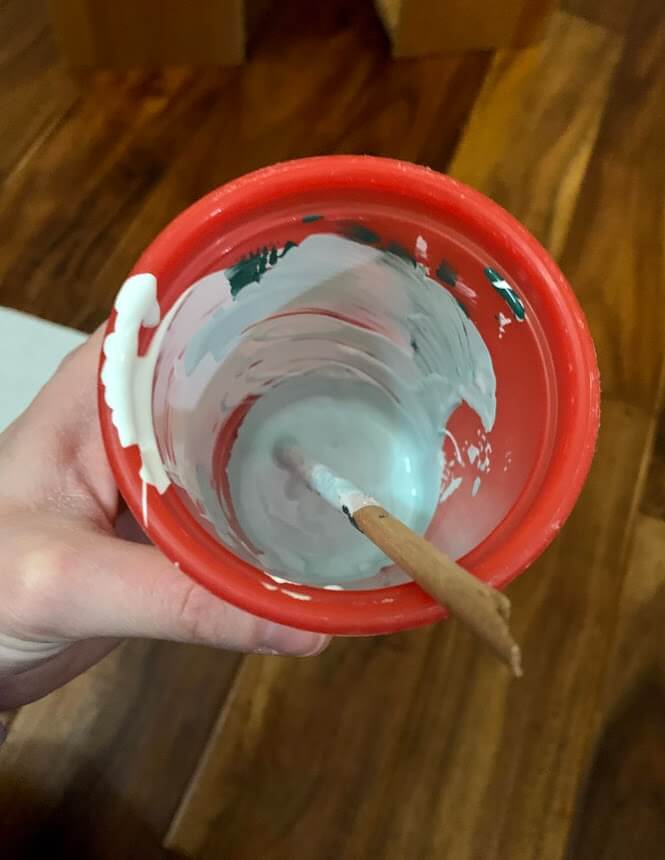
My process for creating the different paint hues and shades was pretty imperfect, but it definitely worked out.
I’m listing the steps I followed below, but an alternative option is to simply pick four (or whatever number) different paint colors! If you do this, I suggest buying a paint sample from Lowe’s or Home Depot to get those colors for much cheaper. It’s about $4-5 for 8 ounces of paint.
In fact, I used less than two paint samples total for my entire dresser!
How to Create Ombre Shades from One Paint Color
Start with your base color (mine was white), and add a TINY TINY bit of your ombre color choice (mine was green). Add this conservatively–you can always add more, but you can’t remove paint.
(Well, technically, you could add more white paint. But I think that would get confusing really fast…)
In fact, it probably won’t be enough the first time. I think that means you’re doing it right.
This first color is going to be your lightest color. Keep some of the pure secondary color (like my green paint) near you, so you can reference how dark that color is in comparison with your mixed colors.
Make sure your lightest color is NOT too dark. Having a really light shade at the beginning and creating a very different color is what creates the gradient or ombre effect.
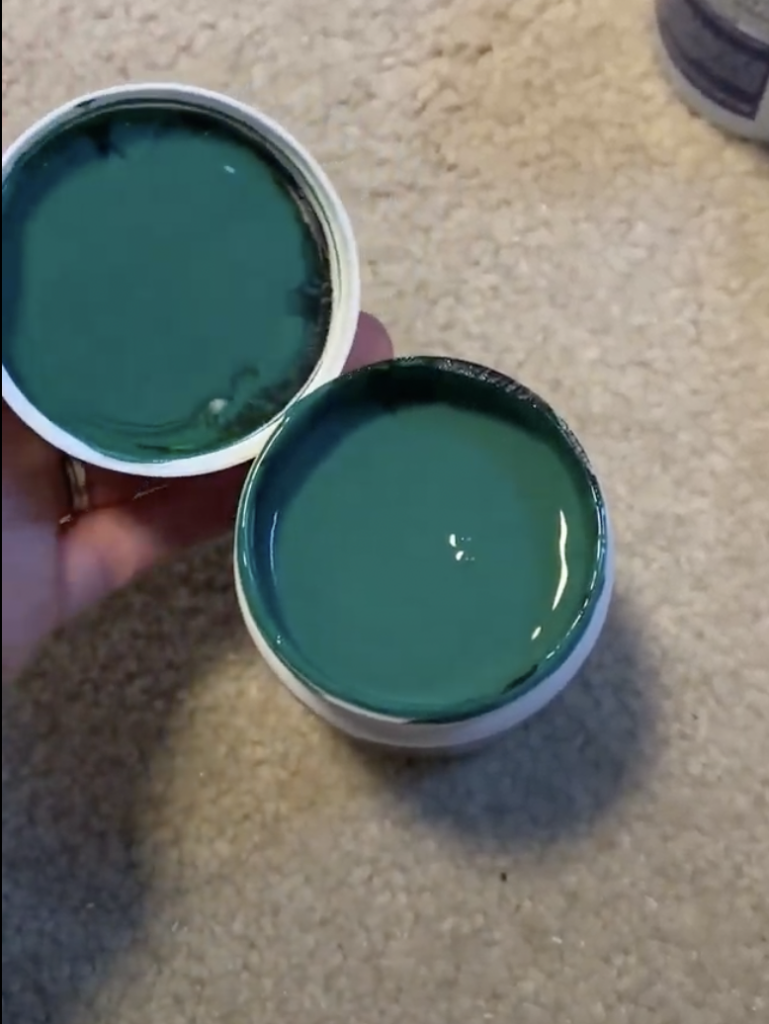
For the next shade you mix, start with white paint again, and simply add more of your secondary color than you did the first time.
Then repeat the process for every level of your drawers or every new color you mix.
Important note: If you follow this process, make sure you mix ENOUGH paint to cover up to two coats on each of your drawers. Since you are mixing two colors together, you probably won’t be able to get the same exact shade twice–better to have more than enough than NOT enough.
Another Technique to Mix Your Ombre Shades
I spent a short period of time on this for two nights in a row. Each night, I did four drawers, mixing two different shades of paint and applying them. This is probably the laziest way to do it, but it worked!
If you want to be SURE that you mix enough paint and the right shades, here’s another idea that might be more efficient:
Pour your base color in four different cups and mix all four shades at once–this would make it really easy to see all four shades and make sure you like the gradient.
The only obstacle with this one is making sure you preserve the paint cups until you’re done. Basically, it would be best to paint all your drawers on the same day with this method. This really wouldn’t be difficult at all, just takes a little time.
Related: If you love the ombre look, check out my printable wall art on Etsy in the Black Door Shop. You can even get 20% off with the code 20OFF. 🙂
Step 4: Seal the Dresser
Now, this step is somewhat optional. In fact, I didn’t seal my dresser originally… but now I regret that.
For one, sealing furniture is just good because it helps the paint and the furniture keeping looking pretty for SO much longer. And with this fun project in particular, it’s going to be extremely difficult to try to replicate the exact same shades again in the future. It’s definitely worth it to just seal them now.
If you’ve never sealed anything before, don’t be intimidated! I promise that it’s not any more difficult than painting the drawers–especially if you use the right type of sealer.
I highly recommend polycrylic sealer, which doesn’t yellow, is extremely to apply, and doesn’t have much of a stank. You know what I mean. In fact, it barely smells at all.
Plus, it holds up impressively well. I used this sealer when I painted my countertops like granite AND when I painted my fireplace tile.
Of course, I wouldn’t recommend this sealer for countertops in the future, but they held up shockingly well at the time.
…All of that to say, it’s a fantastic option for sealing furniture. Even though it is an extra cost, it’s usually only around $20, and will last for multiple furniture projects.
What happens if the ombre dresser paint gets chipped?
Oh, the horror.
In my house, scratches and knicks (or, ahem, kid’s markers) will inevitably find there way onto any piece of furniture we have.
For an ombre dresser, there are a few ways to handle it.
Like I mentioned, it’s unlikely you’ll be able to PERFECTLY match the shade of paint a second time. So you have two options:
- Try your best to match the color and patch it. OR
- Mix a different, but similar shade, and repaint the drawer
Honestly, either option wouldn’t be very difficult, so it’s not something I’d worry about.
Plus, if you seal your drawers, this is unlikely to be a big problem.
Step 5: Add Hardware
This is the best part because it’s quick, easy, and just puts the final finishing touches on your beautiful work!There are literally an endless number of knobs or drawer pulls that you can use for your dresser, but I used these gold knobs from Lowe’s. I also LOVE the knobs that are usually at Hobby Lobby, plus they run 50% off sales every few weeks.
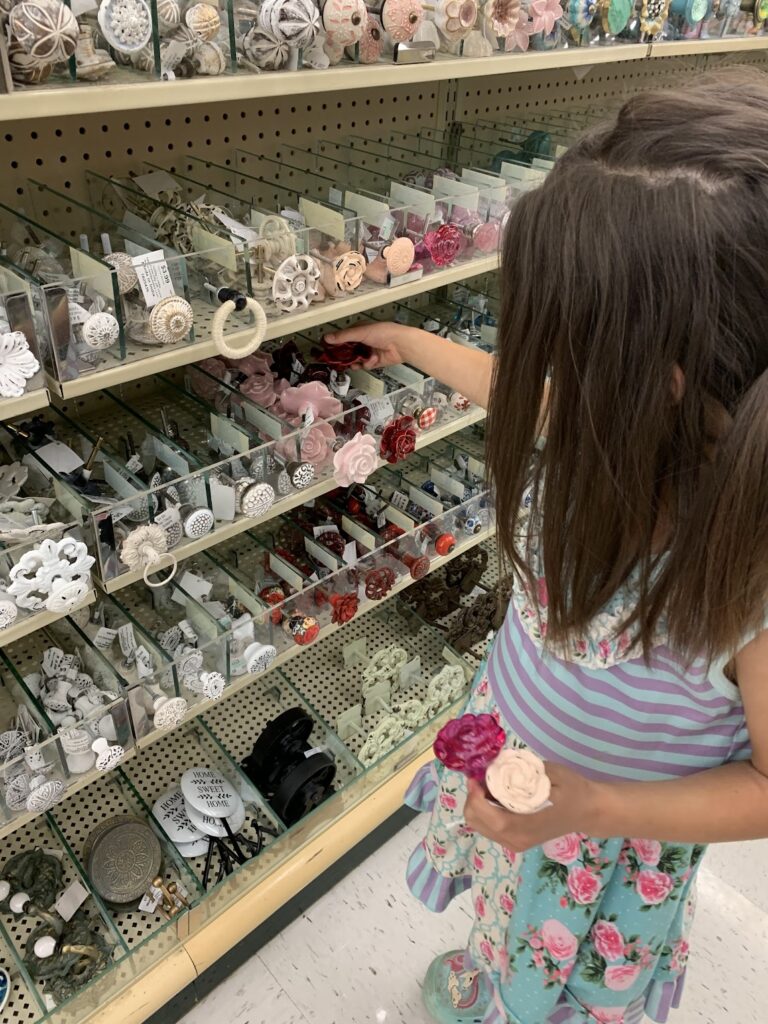
This little girl thinks so too–plus, she’s probably the best model Hobby Lobby has ever had, right?
PS, they aren’t an affiliate, so I don’t get anything even if you actually buy knobs from Hobby Lobby–they just really do have the best knobs 😛
Step 6: Admire Your Beautiful Ombre Dresser
That’s it! This old dresser turned into a real thing of beauty–and from just one color of paint. 🙂
Want to see the ombre dresser process in motion? Well here you go:
Make sure you read some of my other crafty posts: