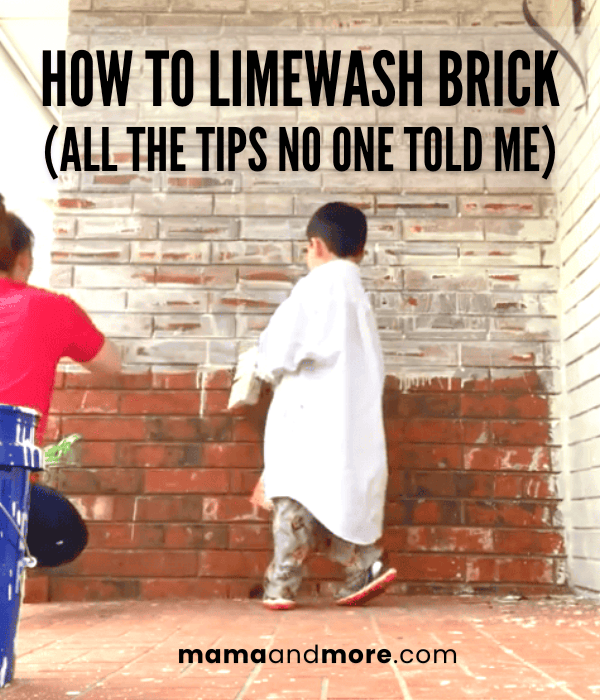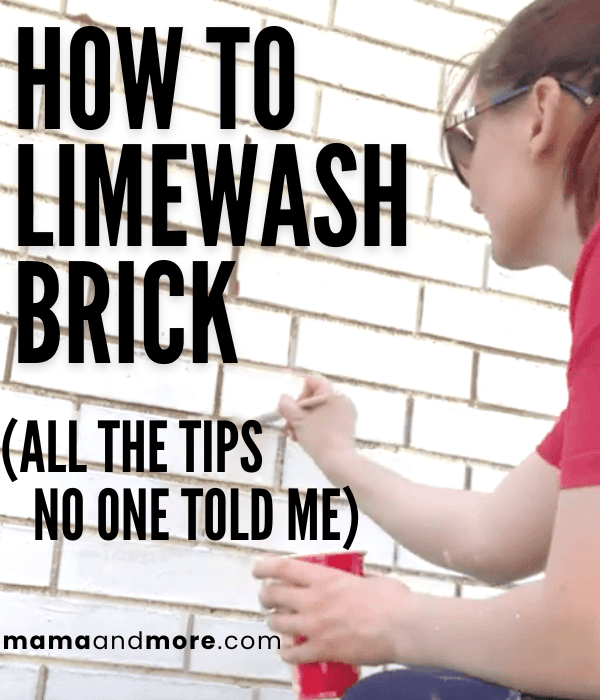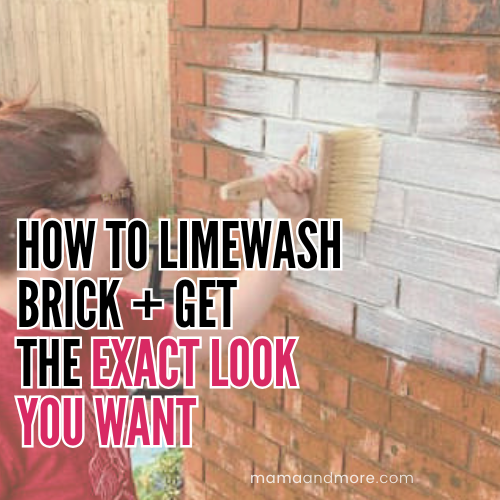
I did my limewash brick house in 2022 after doing WEEKS of research. Even though it’s a simple process, none of the tutorials I found were clear–and I ended up running into so many issues that could have been prevented! This post includes so many tips and additional resources to help you be confident tackling your limewash brick and to get the exact results you want. Read on for tips on how to limewash a brick house!
Here’s what we’ll cover:
- Tools & Supplies
- Prepping Brick for Limewash
- 5 Steps to Limewash Brick House (Click here if you just want the quick process)
- Limewash Brick Tips & Techniques
- Before and After
Make sure you check out a variety of examples to decide how you want your limewash to look in the end. Read my collection of 20 Limewash Brick Before & After Examples.
Limewash Brick Supplies
To make your brick limewashing project as easy as possible, I’ve attached links to the materials on Home Depot, Lowe’s, and Amazon. HD and Lowe’s both offer online ordering and usually do same-day pickup.
- Romabio’s Classico Limewash [Lowe’s, Home Depot, Amazon]
- Pressure washer to clean your brick
- Paint sprayer OR masonry brush [this one from Lowe’s (NOT the $7 brush!), Home Depot, Amazon]
- Grout mixer drill attachment [Lowes, Home Depot, Amazon]
- Hose [Lowe’s, Home Depot, Amazon]
- Sprayer attachment for hose [Lowe’s, Home Depot, Amazon]
- A few additional buckets for mixing [Lowe’s, Home Depot]
- Large sponge (depending on your style) [Lowe’s, Home Depot, Amazon]
- Suggest having a few cheap brushes ready
This blog post & my YouTube video include SO MANY DETAILS that would have transformed my limewash house–making it easier and getting a better result. But for ALLLLL the tips, information, mistakes, and everything, I’ve consolidated it all into my Complete Limewash Brick Ebook. This has 40 pages of tips, photos, videos, research, and common mistakes to avoid. And it’s less than $5!
Additional Notes on Limewashing Supplies:
- Make sure you get a grout mixer, like the ones linked above, and not the same kind you see me using in my video. While it did work for me, I used the drill mixer from my countertop epoxy project, and it could have been more efficient with the right kind of mixer.
- DO NOT GET THE $7 MASONRY BRUSH from Lowe’s. It seems like it wouldn’t make a difference, but it does. That one loses so many pieces that it’s just not feasible. The one I’ve linked is only a few dollars more, but works SOOO much better.
- If you’re wondering, do I HAVE to brush my entire house with this?! Well, that’s the route I chose–however, it IS possible to apply it with a paint sprayer. I tested it out just so I had an understanding of both options. Here’s my detailed YouTube video on the difference between spraying and brushing limewash!
Related: How to Build an Easy DIY Window Box
Prepping Your Brick for Limewash (Super Important!)
Before lime washing, you need to prepare and clean your brick and your house. Like paint, prep is SUPER important and can also be SUPER annoying. Here’s a very quick rundown of how you need to prep for limewash brick exterior:
- Clean your brick (ideally with a pressure washer, but you can hear more about that in my YouTube video)
- Limewash is SO MESSY, so protect surrounding areas that you don’t want to clean after with cardboard, plastic, a dropcloth, whatever
- PLAN PLAN PLAN: Romabio’s limewash should be applied when it’s between 50-90 degrees and not raining (but watch this video to see what happened when it rained on my limewash house)
NOW. That’s all it takes to prepare your brick for limewash–but that’s DEFINITELY not all you should do before starting.
Unfortunately, your brick exterior can turn out very poorly if you don’t know all the things I didn’t know. Before actually tackling your house (or another brick surface), PLEASE make sure to read Limewash Brick Tips & Techniques below, which includes all the tips I learned for this process.
Related: How to Wrap Porch Posts with Wood (Behind the Viral TikTok)
Pssst, I’ve made some pretty fun DIY t-shirts for you or for great gifts. Check out my designs in my Etsy shop Black Door Fits!

How to Limewash Brick: 5 Simple Steps
In this section, I’m going over the steps to apply limewash for brick exterior.
HERE’S THE THING. The steps are pretty easy. But the tips below them are what will REALLY make or break your limewash house. So don’t skip that part, I’m begging you!
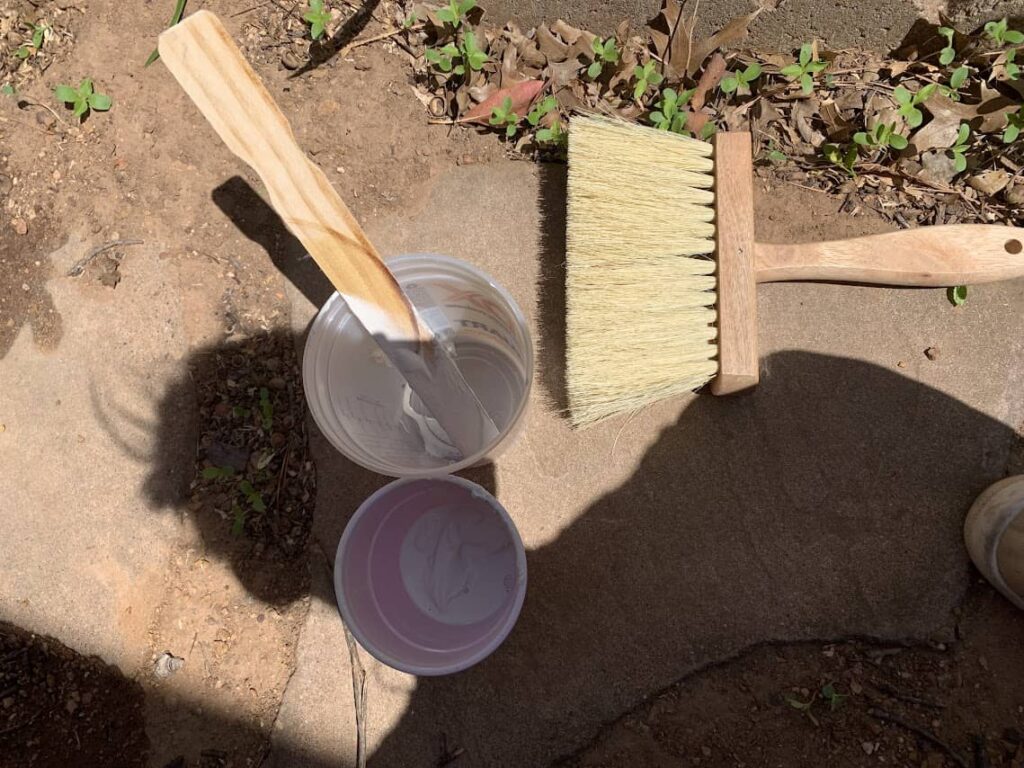
1. Mix the Limewash
Get on your messiest paint clothes, open up that bucket of limewash, and get ready!
When you first open the Romabio limewash container, it’s kind of like a thick peanut butter consistency with a lot of water that rises to the top.
I recommend mixing that up a little bit first without adding water. Then, if you’re limewashing a house and not a smaller interior brick area, transfer some of the limewash to a separate container to start mixing.
This is the part where you’re going to have to find and continue to create the right consistency for the specific look you want. Read more about that in the “tips” section below, and check out my post with 20 limewash finish examples to figure out what look/finish you want for your limewash house exterior.
Reminders:
- TEST what mixture you want before tackling your entire project
- Don’t get too particular about the mixing because the texture changes over time
- The dilution ratio you use will depend on the look you want: opaque, light, distressed, etc.
Watch this 1-minute video with *most* of my limewash mixing tips–and subscribe to my YouTube channel if you want to be my favorite person right now 😛❤️
2. Spray the Brick with Water
First of all, this step is SEPARATE from making sure your brick wall is clean.
Limewash paint must be applied on a damp surface, so use a hose and spray a section of your brick with water.
I recommend doing relatively small sections, especially in the beginning as you perfect your technique. With temperatures between 50-90 degrees, the water you spray on your house evaporates quickly.
Related: An *Honest* Peel and Stick Floor Tile Review
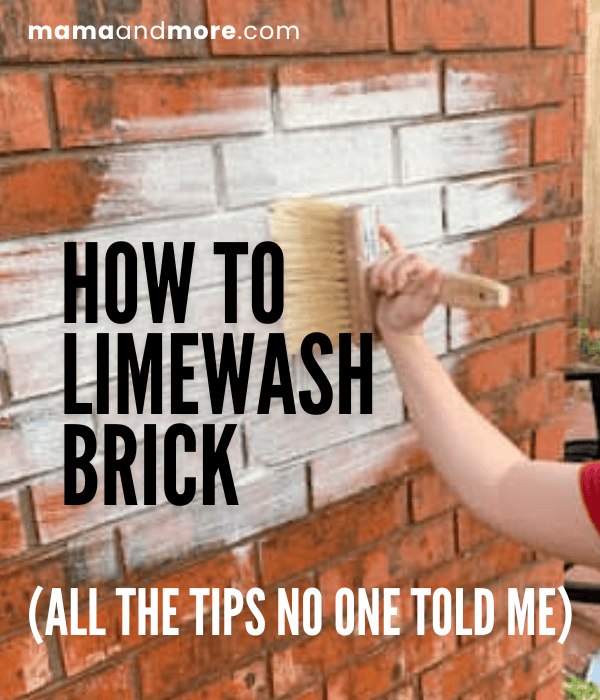
3. Apply the Limewash
With the mixture ready and damp brick, pick up your masonry brush and just start applying!
Keep in mind that the limewash is a much different texture than paint, so it may feel a little funky at first. But in general, this is just brushing it on like you’d brush anything. But much more splatter-y.
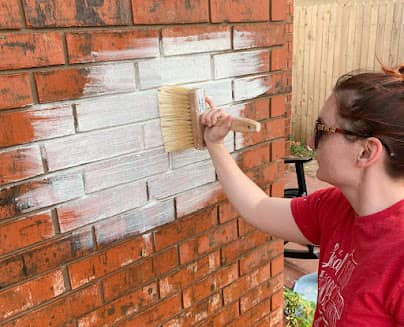
Important note: Watch my YouTube video with all the details about applying limewash with a masonry brush vs. a paint sprayer.
If you’ve practiced your technique in advance and you have the right mixture, this is a really simple and intuitive step of the process. If you haven’t practiced your technique…. Well, you should do that. Read all about that below!
(Pssssst, if you have deep grout lines like I did, I BEG YOU TO READ THAT SECTION)
4. Distress & Customize Your Limewash Finish
After the limewash is on the brick–one section at a time–it’s time to customize the look! This is where it’s important for you to already have your technique figured out.
Important tip: With Romabio limewash paint, you must rinse/distress the limewash to get the look you want within the first few hours of applying it (sometimes even less!)
Adjusting the finish can include:
- Doing nothing for an opaque, flat finish (essentially what we ended up doing)
- Distressing small areas with a sponge, cloth, spray bottle, or anything else
- Lightly rinsing the limewash for a more transparent finish
- Any combination of the above!
Keep in mind that the limewash dries more opaque than it first goes on. This is one of the many reasons why experimenting is such an important part of the process! Again, there are many more details about this in the tips section below AND in my full YouTube video.
5. Cleaning Up The Limewash Mess
See how the actual steps of applying limewash for brick is super simple on paper?
After the application, this is the part when you’re going to look around and laugh. Because you, the house, the ground, the air… it’s ALLLLLL going to be covered in limewash.
However, fear not! Limewash is made from actual Dolomite lime, which is a natural element that’s environmentally friendly, it’s really easy to clean up if and when you find a mess in the aftermath.
You can kind of see in this picture what part of the ground looked like.
I did see a guy on Instagram a few months ago limewash a brick house, use cardboard to cover the ground, and it looked like he basically had no mess to clean up afterward. It’s worth a try, but it’s also Instagram…. they never show you everything.
It’s just messy, okay? If you’re not okay with messy, then a lot of DIY projects are probably not for you.
But thankfully, limewash is extremely easy to clean up–especially if it’s done quickly! If you pay attention to your mess as you go, you can essentially just rinse it off.
Of course, I did NOT pay attention to my mess as I went 😂
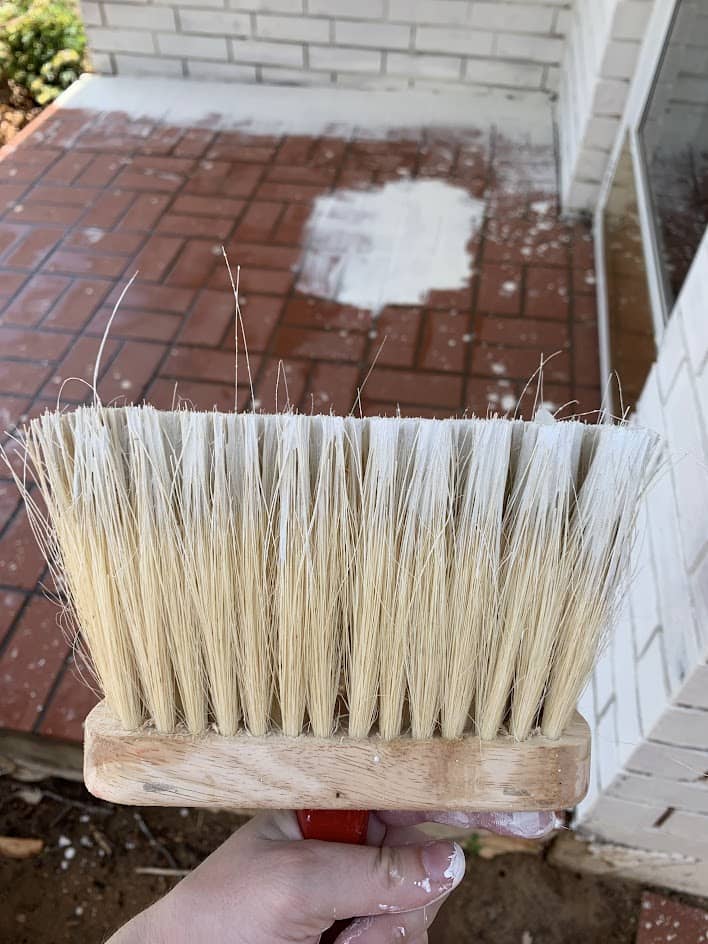
I was very happy to find out–WEEKS later–that you can just scrub limewash off of stone or cement or whatever with a cleaning brush like this one.
In fact, limewash on brick is removable too! At least, within a few hours. This is one of the many reasons why I prefer to limewash brick instead of using regular paint.
Now! You’ve read through the basic steps, and it’s time to talk about all the ways this project did NOT go as planned–and all the things you can learn from my experience.
Limewash Brick Tips, Techniques, & Mistakes I Made
Even though there are only a few steps to my limewash red brick house, there are SO many different ways that it can go right or wrong in between. Although I enjoyed the process and WOULD recommend limewashing to anyone, it was frustrating to do SO much research… only to find that there were a million little details that no one mentioned.
I always want to be the person online that you can actually trust to give you the real deal (and to make every possible mistake), so here we go. Here are 5 important tips you need to know:
1. For the Love of Pete, Test Your Limewash Technique FIRST
One of the many differences between limewash and latex paint is that limewash can be manipulated in so many different ways to look very different. That’s kind of fun!
But it means that you absolutely HAVE to practice on a test area before you go tackling your entire house. Here’s my short video with my quick tips on how to test it out!
Every little thing you do will change the way your limewash looks–and if you’re doing a full brick house, that makes a big difference.
Here are all the things you need to pay attention to/decide on for your limewash technique:
- How much you want to dilute it (a little bit of water can make a big difference!)
- If you want your finish to be opaque, transparent, or in between
- IF you want to distress it & how much
- What technique gets the distressing you want (a rag, sponge, or a hose)
- The depth of your grout + how you will cover the cracks
DON’T STOP PRACTICING until you feel completely confident that you know how to get the look you want.
You can see that I did do a test area on my house, but I really didn’t mess around enough and I wasn’t confident at all. This ended up making me get a different result than I really wanted.
Even though I think the limewash has given our house an AMAZING transformation, I would have loved a more transparent and distressed look. You live and you learn–and I hope you can learn from my mistakes!
2. Treat Mixing Like an Art, Not a Science
A super SUPER important tip that Romabio doesn’t specify (or anyone else I found online) is that the limewash paint’s consistency WILL CHANGE THROUGHOUT THE PROCESS.
The water inside the mixture evaporates–and can evaporate pretty quickly, depending on the weather!–so you will have to be adding water and mixing the limewash many times throughout the process.
This is why you need to practice enough to be confident. Just finding the perfect mixture one time will not be enough.
If you use Romabio limewash, they have this dilution ratio guide:
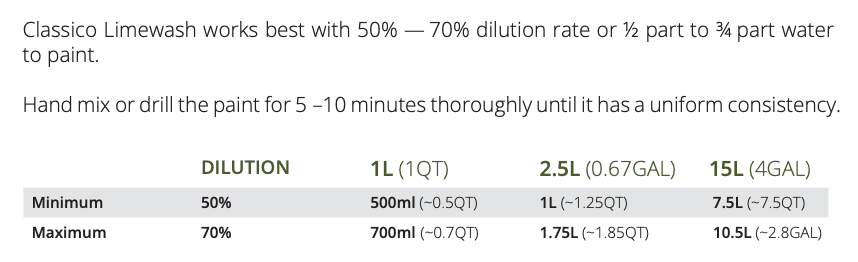
However, this makes it seem like you need to be measuring out ounces to get it perfect.
THAT AIN’T GONNA HAPPEN. It’s a good guide to have on hand, I guess, but finding your ideal consistency really depends on your brick, weather, and the look you want.
Therefore, just practice your technique and get a general estimate of the mixture that works. Then reference that generally–don’t worry about every single ounce of water.
Related: 50+ Summer Letterboard Quotes
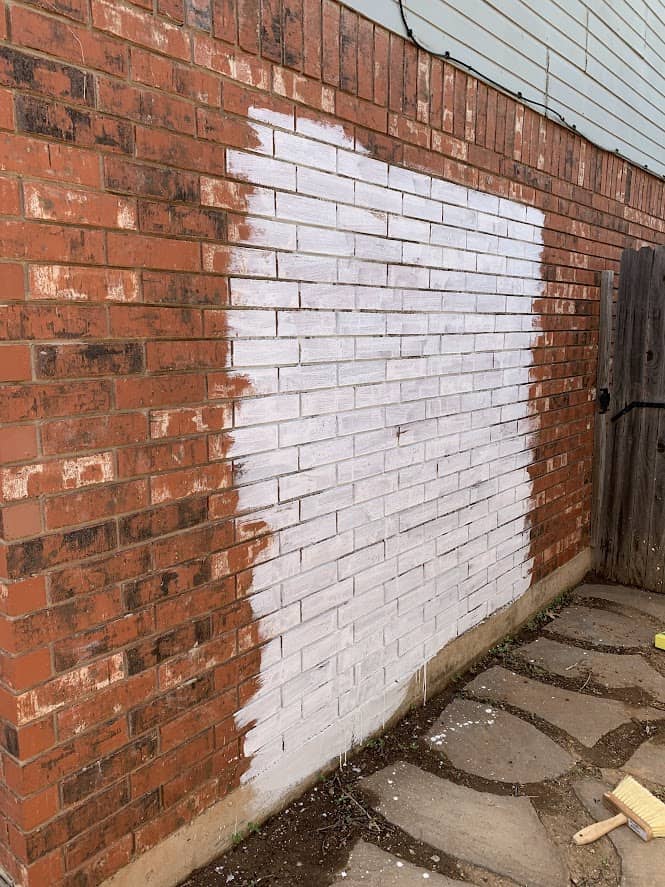
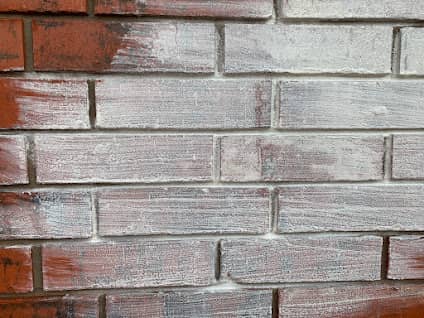
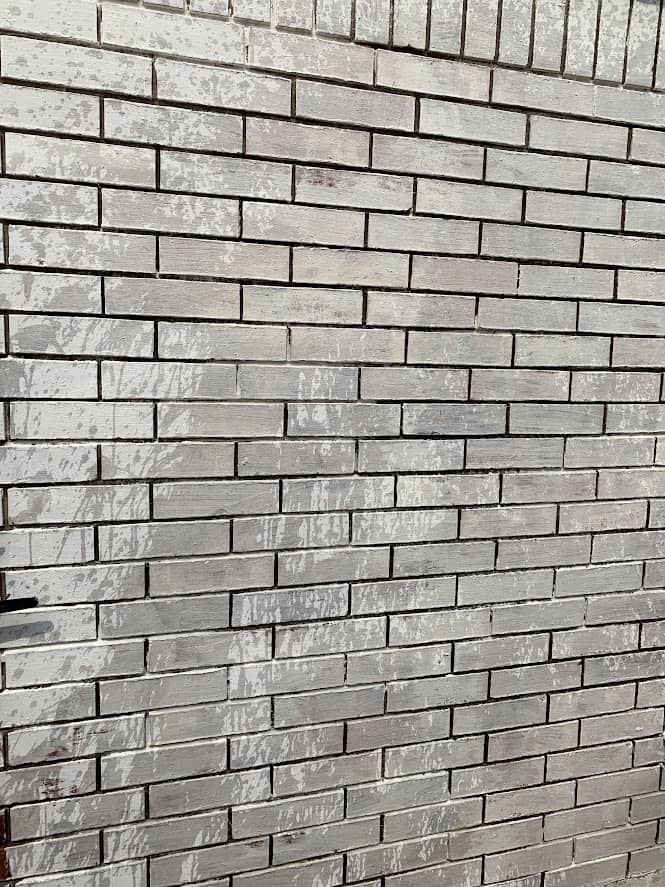
3. Check Those Lines, Girl
This is another one no one EVER talked about, but holy crow, it had the biggest impact on my limewashing result.
Before starting, check how deep your grout lines are and how it looks with the limewash.
On the small square that I tested, I didn’t really notice how dark all the grout lines stayed. I also wasn’t paying attention to it, of course (haha).
See how it kind of looks fine when you’re only looking at a small part of it?
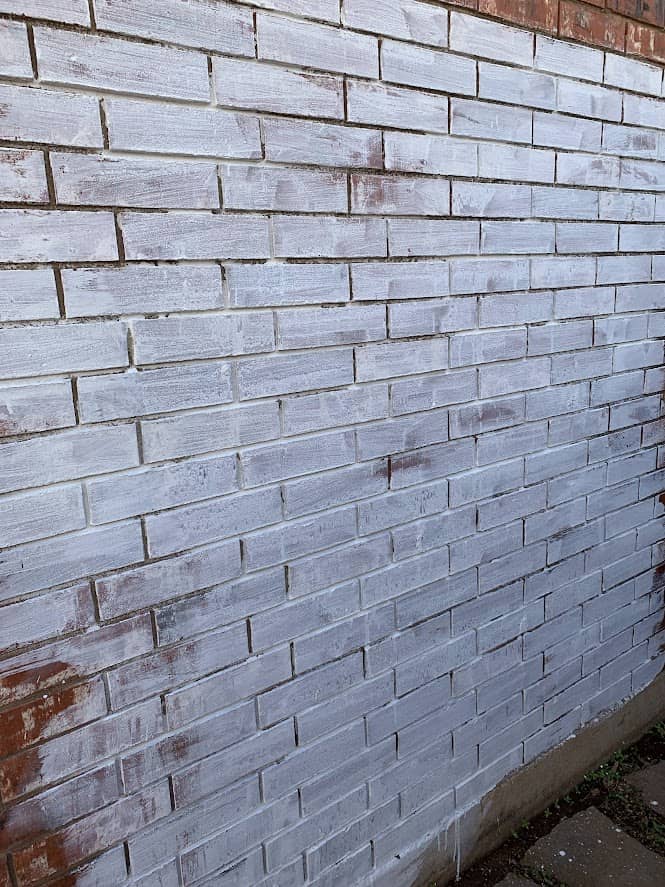
But once I’d covered one side of my house, it was suddenly standing out in a way I did NOT like.
Feast your eyes on a moment I took a picture of because it was VERY depressing:
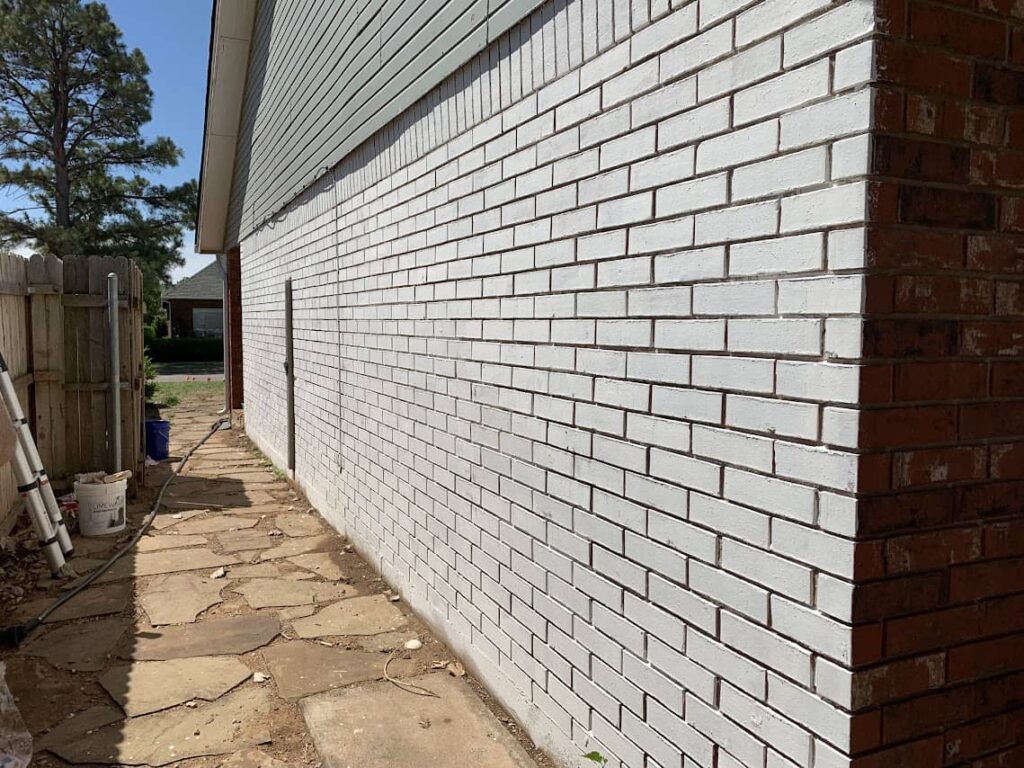
Obviously, that puke siding color doesn’t help this situation, but WOW.
Have you ever worked for weeks to prep for a giant project, set aside a perfect day to get it done, and then realized partway in that it was turning out terribly?
It’s EXTREMELY discouraging.
Obviously, I immediately realized how deep my grout was, and that I had to find a way to cover the grout as evenly as the brick.
I tried multiple things to fix this problem:
- First, I just tried to paint in the cracks with the same brush. It just didn’t work.
- Then, I took a tiny brush and applied in the grout. And quickly realized that if I stayed with that technique, I’d still be limewashing 17 years later.
- Next, I watered down the mixture MUCH MUCH more. This did work… except that the water evaporated quickly, AND the finish on the red brick looked much different than the way I’d been doing it before.
- Finally, I found a technique that worked. It was basically two coats, one EXTREMELY water consistency to fit in the cracks, and a thicker consistency to cover the front.
Looking back, I kind of wish I had just used the very watery consistency for the whole house to get a slightly transparent look, like this one. But that’s why I’ve made this post, my YouTube video, AND the limewash e-book–to help other people actually get the result they want on their limewash brick house.
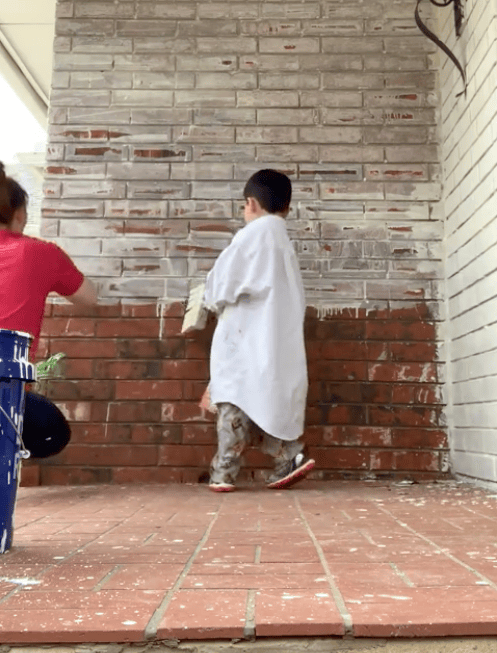
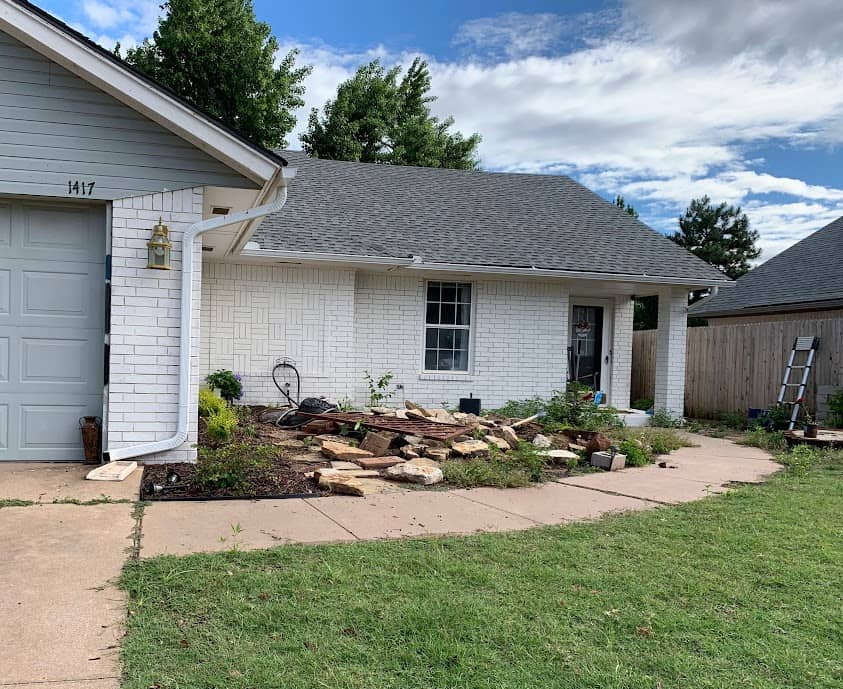
4. Don’t Start in the Front of Your House
Give yourself time to perfect your strategy before working on the most visible areas of your house.
This is one thing I actually did right! Well, mostly.
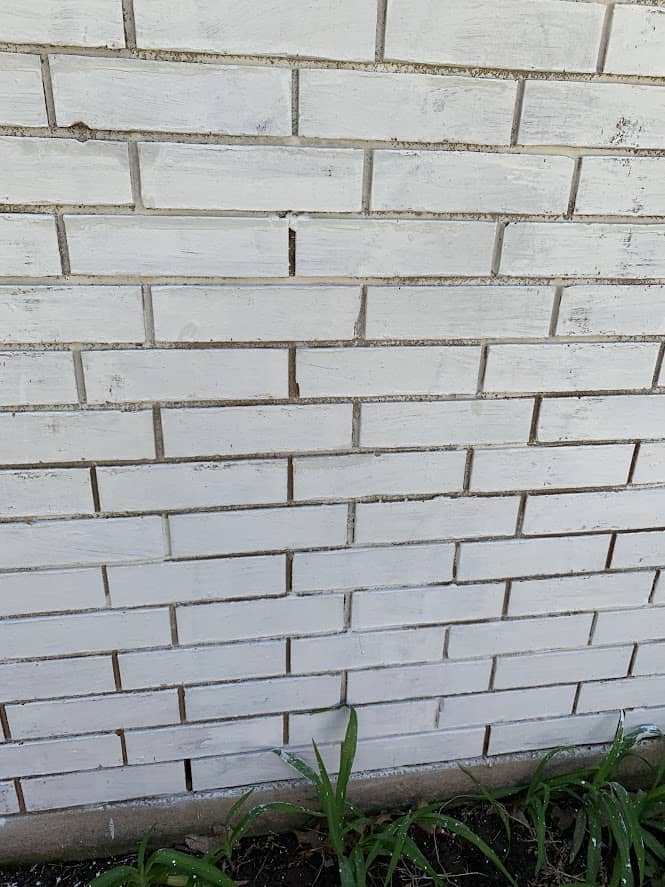
I did my test area on a side of my house that almost no one sees. Then, when I went to tackle the whole house, I finished that side, went to the back, then the other side of the house … and then FINALLY went to the front.
This helped me make the biggest mistakes in areas that no one really will see. By the time I worked on the front, I finally a good technique down. Thankfully, the front is the BEST side of the house.
(You can see the finish here, although this is OBVIOUSLY still a progress photo of the rest of my exterior.)
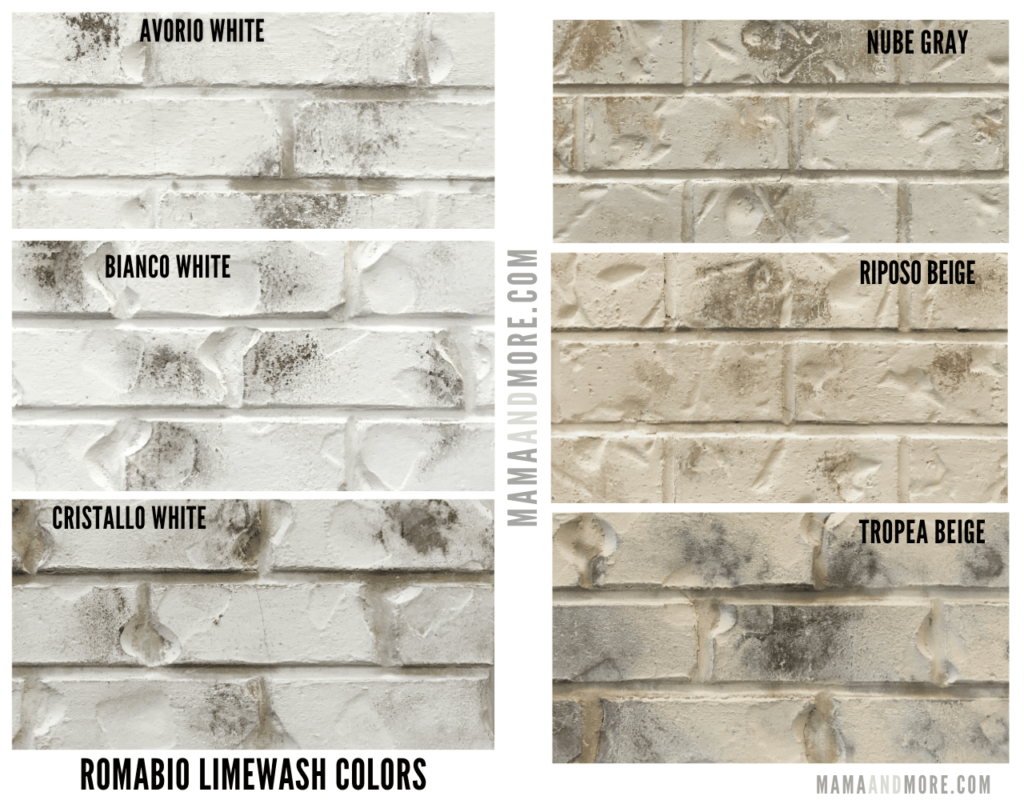
5. Pick the Right Limewash Color
This isn’t one that I necessarily did wrong, but I would strongly recommend looking into all your options before buying.
If you use dehydrated lime, I don’t think you have any color options. However, Romabio has six different colors of limewash for your home’s exterior! They range from white to beige, and you can see the comparison here:
Limewashing is a big project–and I want you to get the EXACT look you want. I used notes, photos, videos, and research from all my limewash experiences to create the MOTHER OF ALL LIMEWASH RESOURCES. This includes all the details you need to know to tackle your limewash project and absolutely love the result. Get the Limewash Ebook for less than $5!
Why use limewash for brick?
There are so many benefits to using limewash instead of traditional paint on your brick exterior. Here’s a quick breakdown of the reasons I chose to go this route:
- Much better for the brick — allows the brick to breathe instead of sealing in moisture
- Extremely low maintenance
- Eco friendly
- Easy to apply as a DIY project (as long as you use my tips!)–doesn’t need multiple coats
- It’s removable!
- It ages naturally & beautifully, patinas over time with different weather elements–meaning it’s a very durable finish
- You can get a very natural finish or an opaque finish, and adds so much visual appeal to a home
My Limewash Brick House Before & After
I don’t feel like my limewash before and after is jaw dropping, partly because of my lack of photography skills, and partly because of the landscaping I just could never master. But hey, progress over perfection, right?!
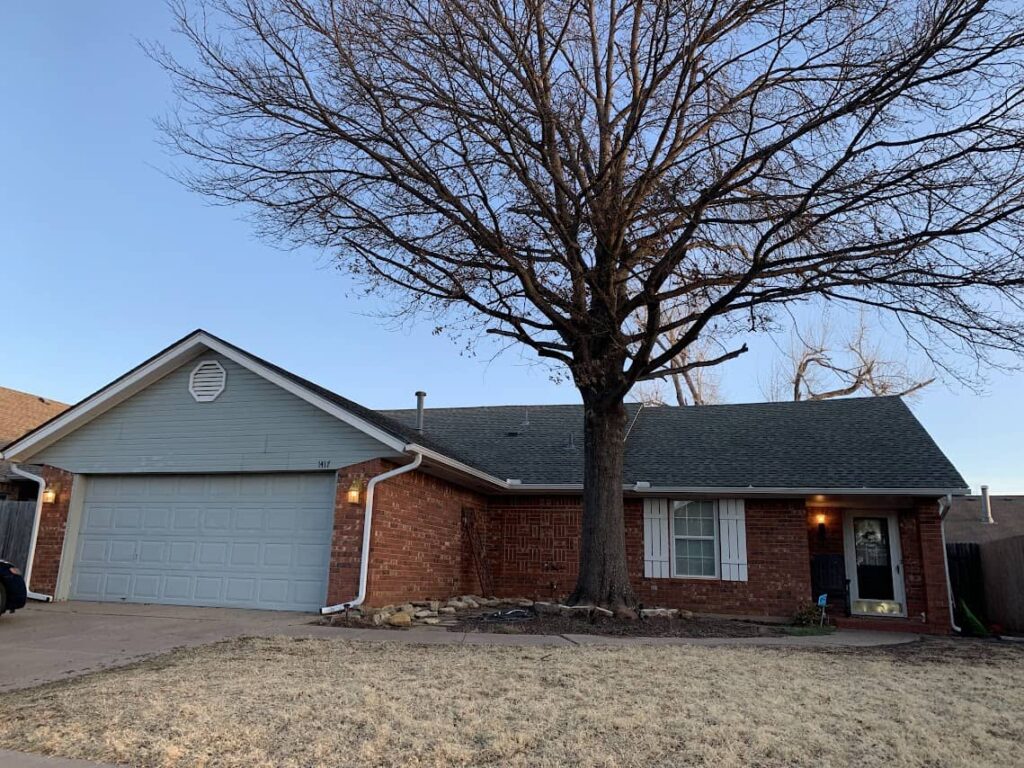
My exterior makeover included removing a massive tree, limewashing the brick, painting the siding and garage, upgrading the light fixtures, painting my storm door, and designing a new landscape (which was a rouuuggghh process because I got tied up with a bad landscaper).
March 2022:
June 2022:
Final result:
You can kiiiiind of see more of the process in this post: Front Porch Makeover
In the end, the limewash helped me create something beautiful. It has a matte finish with very natural texture. Although I didn’t exactly achieve the exact appearance I wanted, I still think it’s given the house new life.

If you’re considering whether to limewash brick house, I really hope this helps! I’ve been working hard to put all this information in here to help other people get an even better result than I did. Don’t forget to the get the Limewash Ebook for less than $5!
Let me know what other questions you have on Instagram or TikTok–I can’t wait to hear from you! 🙂
Related: Want another way to add beautiful pieces to your home for insanely affordable prices? Check out my printable wall art on Etsy in the Black Door Shop. You can even get 20% off your order with the code 20OFF. 🙂

More related posts:
- How to Paint Your Front Door (the easy way)
- The Complete Guide to DIY Subway Tile
- DIY Board & Batten Wall