Ah, the 1970’s. Seems like it was a great time. But can we all collectively agree that maybe our homes should change a little bit in the, ya know, 50 years since the 70s?
Lots of people on TikTok did NOT agree, but here we go anyway. This project was done on my friend Jana’s house, and is super simple in concept. You don’t have to adust your exciting porch posts or porch columns at all, you’re just wrapping them in wood to add more depth and modern-ness to the space.
This post is going to go over all the details of exactly how we wrapped Jana’s from porch posts and gave her home a major curb appeal boost. And since this is a safe, mistake-friendly place, I’m also going to go over all the mistakes we made. How else do you learn?
- Tools & Supplies
- Steps to Wrap Porch Posts with Wood
- 4 Mistakes to Avoid
- DIY Post Wrap Alternatives
- The Result
And if you want to see the hilariously controversial video, here it is:
Related: How to Limewash Brick (& all the tips no one told me about it)
Tools & Supplies
Need more details on the best tools & supplies for your projects? Check my Incomplete List of the Best Tools & Supplies for DIYers. It includes ONLY tools & supplies that I’ve personally used and recommend, plus some honest notes about each product and what you really need (and don’t need).
- Nail gun (I have this one and it’s great, but if you don’t want to use an air compressor, I suggest this Ryobi nailer)
- 2 inch brad nails – Lowe’s link | Home Depot link
- Miter saw (or different kind of saw to cut posts to length) – Lowe’s link | Home Depot link
- Sandpaper – Lowe’s link | Home Depot link
- Bar clamps – Lowe’s link | Home Depot link
- Circular saw OR table saw (optional) (Lowe’s link | Amazon link)
Important note: You’ll notice in the video that we also used a reciprocating saw to cut part of the original posts off. This could have been avoided if we had planned in advance for the crookedness of the posts. Plus, you cannot always saw off a piece of a post, so I’m not including that tool on this list.
Supplies:
- Exterior stain & sealer – Lowe’s link
- Cedar posts, 1x6s and 1x8s (OR pressure treated wood or pine) – Lowe’s link | Home Depot link)
- Wood filler – Lowe’s link | Home Depot link
- Caulk (optional) – Lowe’s link | Home Depot link
Important note: Keep in mind that the materials needed will change slightly, depending on your original post and the type of wood you work with. This is a great tutorial for any size post, including 4 x 6 post wraps, 6 x 6 post wraps, and 8 x 8 post wraps. Plus, get even more ideas for your posts in the “alternatives” section below.
Steps to Wrap Posts with Wood
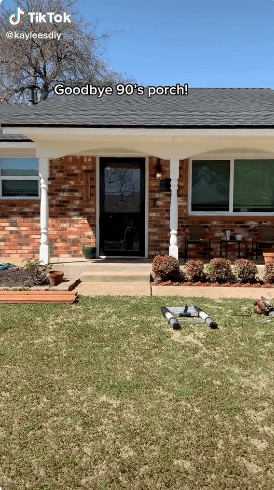
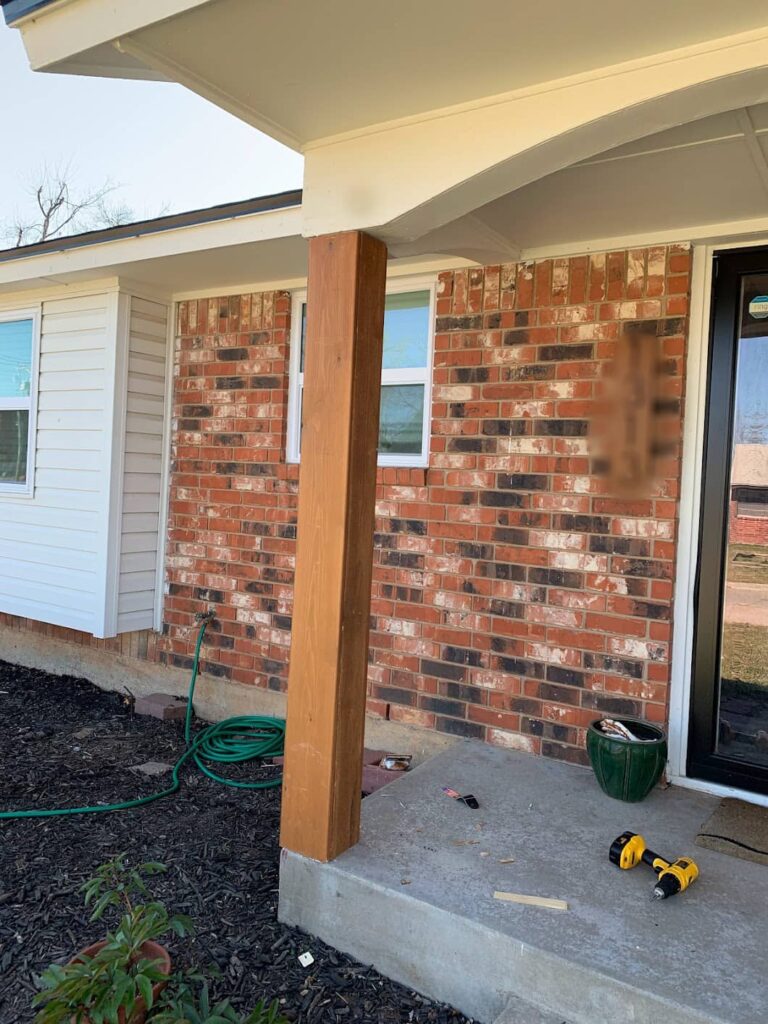
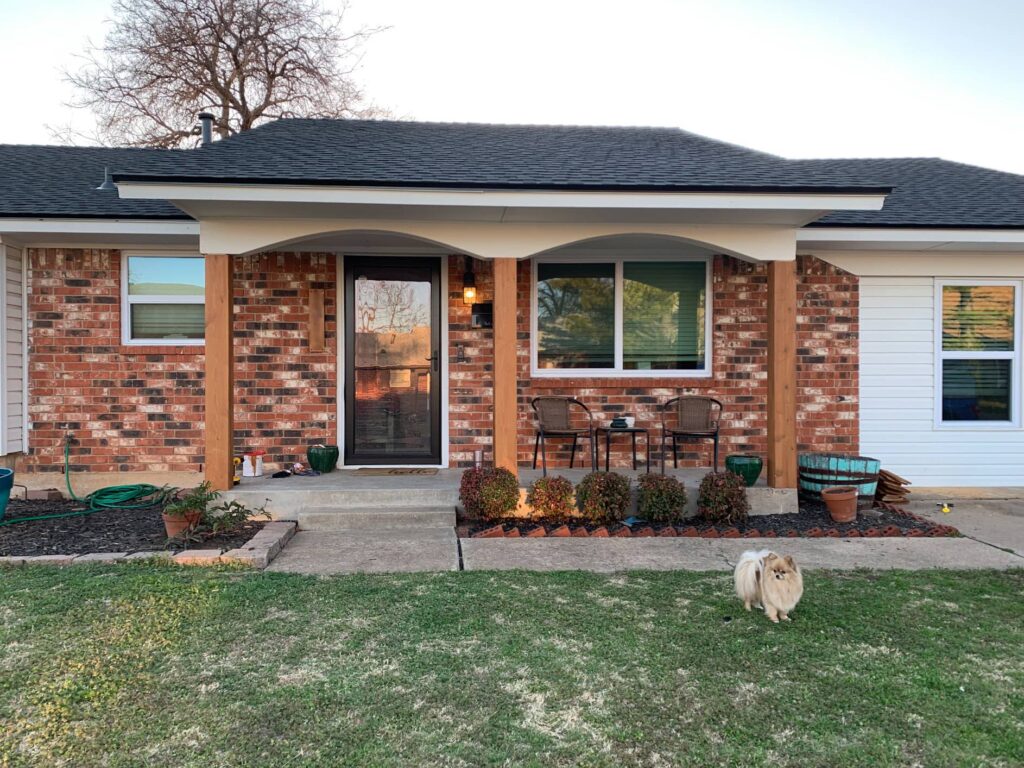
Jana’s house before wrapping porch posts:
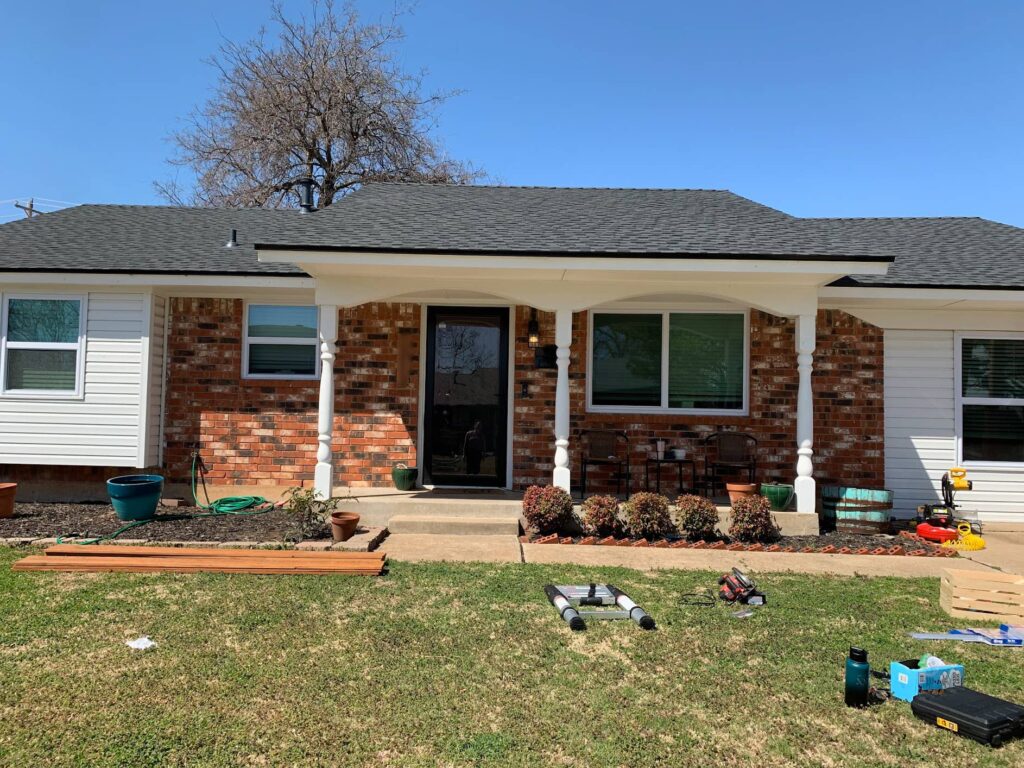
The mess was not originally there, I kindly provided that *immediately* upon arriving. I’m skilled with chaos that way.
Pssst, I’ve made some pretty fun DIY t-shirts for you or for great gifts. Check out my designs in my Etsy shop Black Door Fits!

Step 1: Measure Posts & Plan for Wood
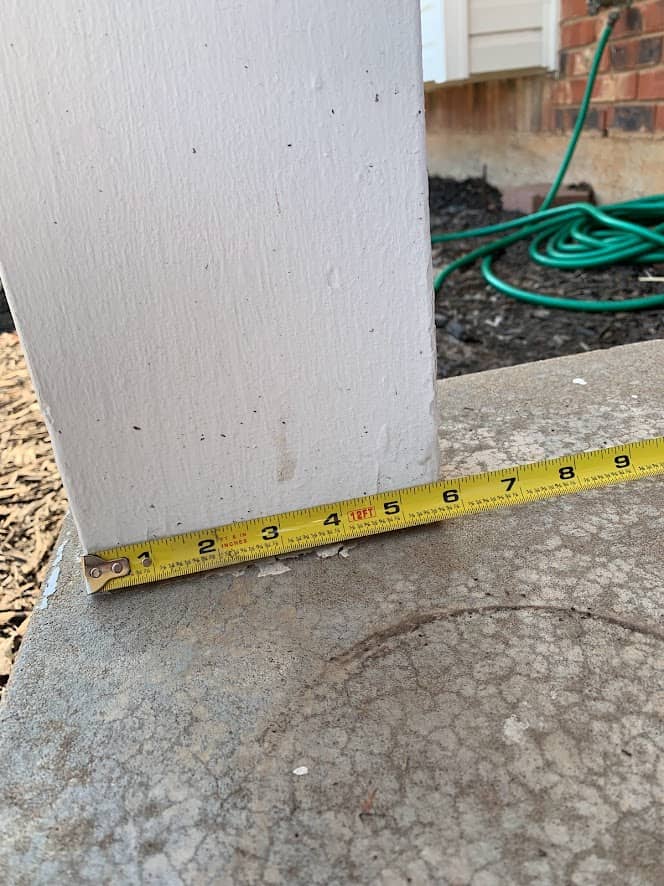
Start by measuring the height of each post, as well as the exact width of each post on the bottom AND top.
In fact, you might want to measure the height of all four sides of each post as well. As shocking as it may be, homes are almost never perfectly straight, square, or level.
When we measured Jana’s posts, the bottom widths were all the same size. However, if we would have measured from top to bottom, we would have noticed how drastically things changed. This ended up being a pretty big hiccup, which you can read more about in the mistakes section below.
What you’ll want to do is get wood that is approximately the same size as the SIDES of your post (maybe a little bigger if you’re able to rip them down to exact sizes). Then, the front and back pieces should be the width of the post + the width of the boards.
I know that sounds confusing, so I’ll give you this calculation for posts that are 5.5 inches wide:
Width of posts: 5.5 inches all around
Width of wood: 1 inch
Front and back pieces must be: 5.5 inches + 1 inch + 1 inch = 7.5 inches

This is why we used 8-inch cedar boards for the front and 6-inch cedar boards for the sides.
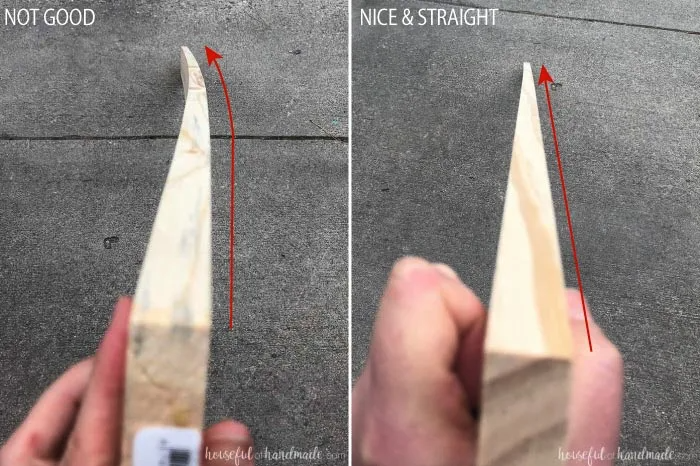
Important note: Make sure you check your boards in the store for bowing or cupping. DO NOT just buy the first pieces you pick up.
MOST boards in Lowe’s and Home Depot are not perfectly straight. You will have to spend some time in the store checking each board before picking them up. Here’s how you can check:
- Turn the board on one edge, lift one side, and look down. You’ll see bends more clearly
- Put the board on the floor and walk on top of it. If it’s straight, it will stay flat on the floor
Related: Read How to Build a Window Box and How to Attach a Window Box to Siding
Step 2: Cut Boards to Size
Once you have the boards, you can simply measure the length of each side of your posts and cut with your miter saw. This is the quickest and easiest step.
Just make sure that you keep track of which board goes to which spot. Since things aren’t straight, each spot will probably be just a little bit different.
Related: Want another extremely creative way to give your home’s exterior personality? Read How to Paint Your Spindles.
Step 3: Stain & Seal the Wood (or Paint)
Since these posts are obviously going outside, you need a sealant of some kind that’s made for outdoor use.
If you paint your boards, you’ll need to prime them first, then do 1-2 coats of exterior paint. Or, you can also purchase pre primed boards to save an extra step.
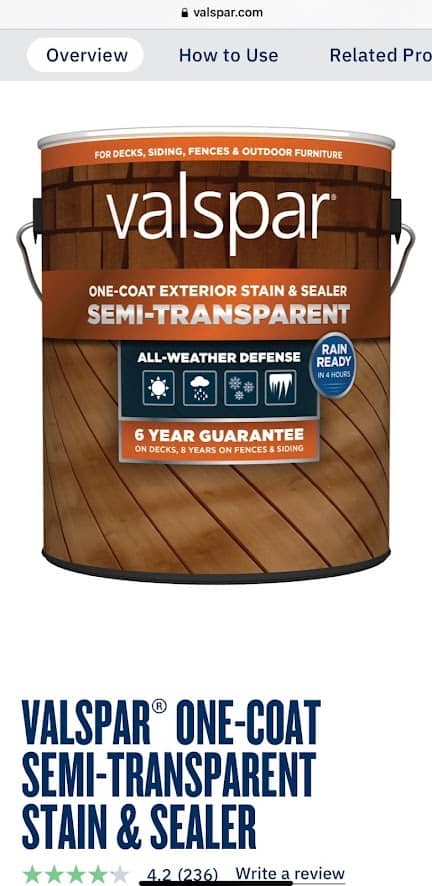
If you stain your wood, look for an exterior sealer. We used Valspar’s Semi-Transparent Exterior Wood and Sealer. This stain actually comes as a neutral base and you have to get it tinted in the store. Jana had it tinted to “Simply Cedar.”
The staining process for this is similar to any other wood. Prep the surface by either sanding it to remove any loose pieces or dirt, or use a bristle brush. Then apply the stain with a brush in the direction of the wood grain. It should be dry within 2-4 hours!
Important tip: Make SURE to apply stain to the bottoms and edges of your boards. This is important to prevent moisture from damaging your beautiful wood posts.
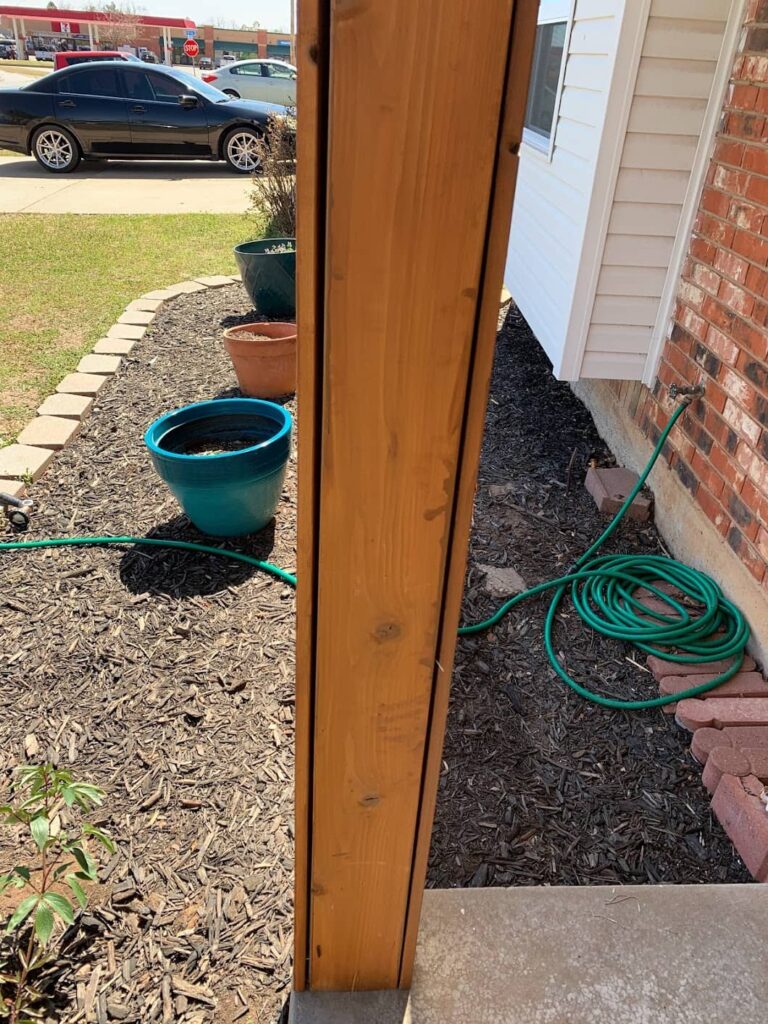
Step 4: Attach Side Pieces to the Post
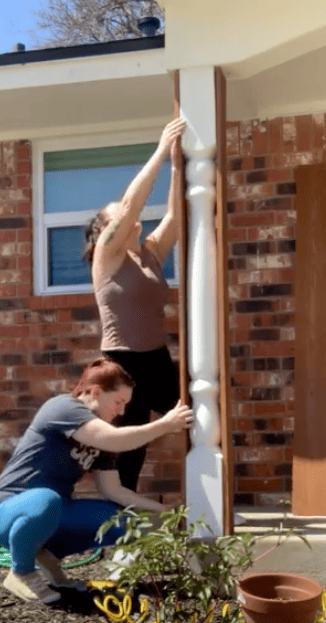
Let’s finally get to the meat of this project! I 100% recommend holding all four of your boards up to the post BEFORE nailing anything–make sure that everything fits and is flush.
Ours was not. But again, more on that later.
You start with the side pieces because this keeps the front of the post free of seams, and makes it look beautiful. (I like it. Picasso.)
It’s also important because you’ll actually nail the front and back pieces into the side pieces. That’s why you need to be sure that you have these placed perfectly. To do that, start with just one or two nails to hold the board up, then check again to make sure it will reach the front board with no gaps.
Then go ahead and blast that nail gun until your heart’s content. It’s too much fun.
Related: Get the EASY guide to paint your front door.
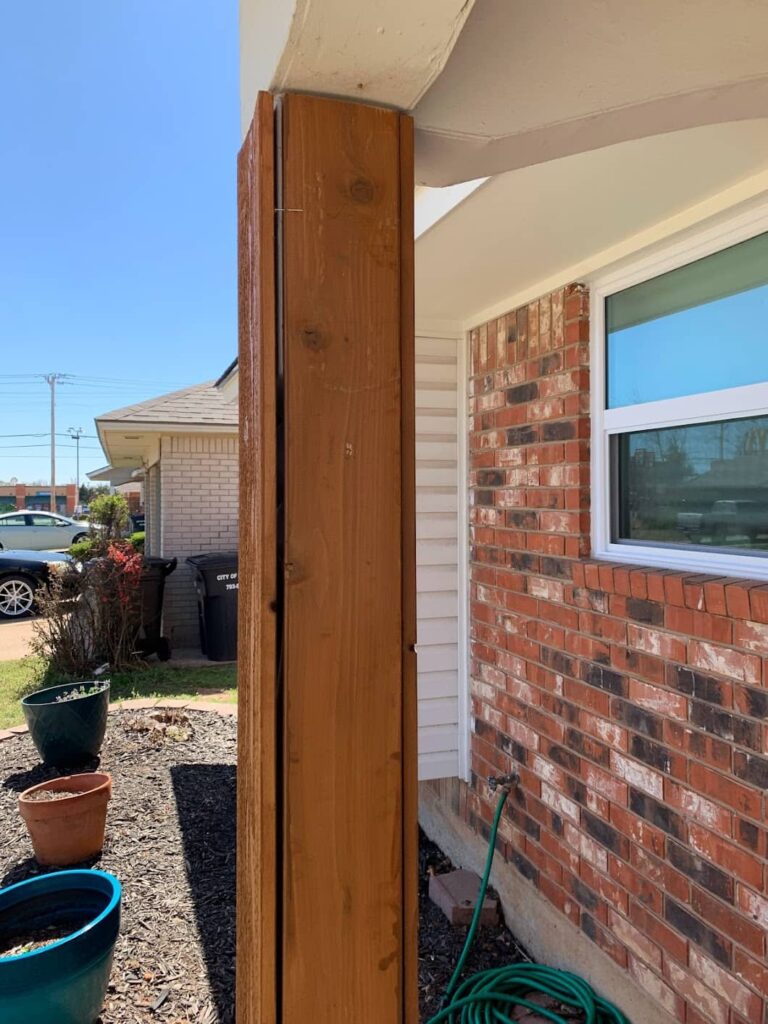
Step 5: Attach Front and Back Pieces
Now it’s time to complete the posts! The instructions are exactly the same for the front and back, so I’m just going to mention the front for now.
Again, DON’T start just adding nails everywhere. Instead, put a single nail in the side of the side board to stabilize the board and make sure it’s in the right position.
In fact, when we put our boards on, we attached everything securely with clamps before nailing everything. This was partially because we had an issue with gaps, but I would definitely suggest doing this anyway.
Regardless, start by securing your front pieces to the edges of the side board. When that is super secure, with multiple nails from the bottom to the top–THEN you can add nails directly into the existing post.
Doing this keeps the wood pieces connected securely to eachother.
That’s the process! However, things are never as easy in real life as they are in writing. Ever.
You might find that you end up having some gaps no matter how hard you try. I will wish you all of the gapless wishes in the world, but it might happen.
The good news is that I learned a long time ago that even the most professional construction workers don’t make things perfect–they just know how to adjust, cover up, and finalize things.
For any gaps between your wood, I’d suggest using a good quality wood filler. Make sure it says it’s fit for outdoor use.
When we had a few gaps that were bigger than we wanted them to be, we also filled them with tiny slivers of the cedar–THEN added wood filler.
Another option would be caulk. Caulk would absolutely be more noticeable, but it would seal the edges for water.

Don’t forget to step back and admire the absolute BEAUTY!
Additional Finishing Tips
You can also use wood filler to cover all the nail holes. You may disagree with me, but I don’t think that’s necessary. Brad nails are tiny and really not noticeable at all. In fact, I almost think adding filler could attract more attention than just leaving the itty bitty holes. But the choice is yours.
Another option is to add a thin bead of clear caulk on the bottoms of your column wraps. This would serve to water-proof the bottoms and edges. However, again, I don’t believe this is totally necessary as long as you apply stain to the bottoms and sides of all your boards.
Related: Get the steps to paint vinyl shutters for another simple curb appeal upgrade.
4 Mistakes To Avoid
Ready for the real life version of this DIY?
Time to remind you that mistakes and hiccups are a NORMAL part of every DIY project–and I’d even say they are the most important part.
That doesn’t mean I’m happy when they come up, but in the end you learn so much more by making mistakes.
Here are a few of the mistakes you need to avoid:
Mistake #1: Getting Bent or Cupped Boards
In our case, the boards were calculated to fit perfectly–if the porch columns were perfectly straight and square.
In addition, the cedar boards we had were severely cupped. I originally thought it wouldn’t impact the project, but was sorely mistaken.
After staining and cutting the wood and my poor friend getting her heart set on using one particular side of the boards (cedar boards have a rough side and a smooth side)–we realized how badly the cupping affected the inside edges of the posts.
GAPS ON GAPS ON GAPS.
While wood is almost never perfectly straight, these gaps were far too large to use common tricks like caulk, or wood filler.
We fixed this by using the side of the boards that were cupped IN instead of OUT, and using clamps to place each board where it needed to be.
It definitely took us longer than I anticipated because we would clamp the bottom, add a few nails, then clamp the top, add a few nails, clamp the middle, add a few nails… and then continue moving and nailing until the boards were much more flush.
If you plan much better for your posts, you could do it so much faster.
Mistake #2: Staining & Cutting Boards Before Checking Fit
This is really an extension of mistake #1. After buying the boards and bringing them home, it would be ideal to test them out around the post and make sure they cover everything.
Once you cut or stain them, you cannot return them. If you catch the mistake before that, you’ll be able to get better boards and simplify the rest of the project.
Mistake #3: Not Using Clamps From the Beginning
In the beginning, I was thinking and hoping that the boards would just magically be perfectly flush without help from clamps.
That is actually a possibility if you can plan perfectly. However, the likelihood of you planning perfectly for EVERY side of EVERY post is, well, slim to none. Even if you don’t have ADHD like BOTH of us do. 😉
Clamps reeeeally help get your boards into the right position. And as you slowly add nails, your boards will actually get straighter.
That’s why we were able to work the miracle of making almost every gap on every post disappear!
Mistake #4: Adding Too Many Nails Before Confirming Placement
Again, this is a different side of using clamps and not checking fit.
I know using a nail gun is fun, but resist the urge to nail a million times immediately. Take it slow, and it will pay off in a smooth, gap-free porch column.
Thankfully, we didn’t really make this mistake–but DUDE, you’d be surprised how secure even just two brad nails into the existing porch posts can be!
Related: Learn about a few ideas to beautify your home if you have an ugly exterior.
DIY Post Wrap Alternatives
One of the fun parts about this project is that it could be adjusted in so many different ways. You could follow the same steps and then add a little more trim to give your columns a completely different look.
Here are a few simple ways you could make your front porch posts unique:
- Paint the posts instead of staining
- Stain the posts a different color
- Wrap only the bottom half of the columns
- Add square trim to the bottom of your column wraps
After doing this project, I’m definitely partial to the simple beauty of these square posts–but the BEST results come when you customize an idea to your style and your home.
The TikTok trolls don’t agree with that, of course 😉
There are also even more options for wrapping your existing column with PVC or vinyl:
These wraps are typically made to snap together, so you don’t need any screws or nails. However, I’ve heard that this is a *royal pain* to get perfectly straight.
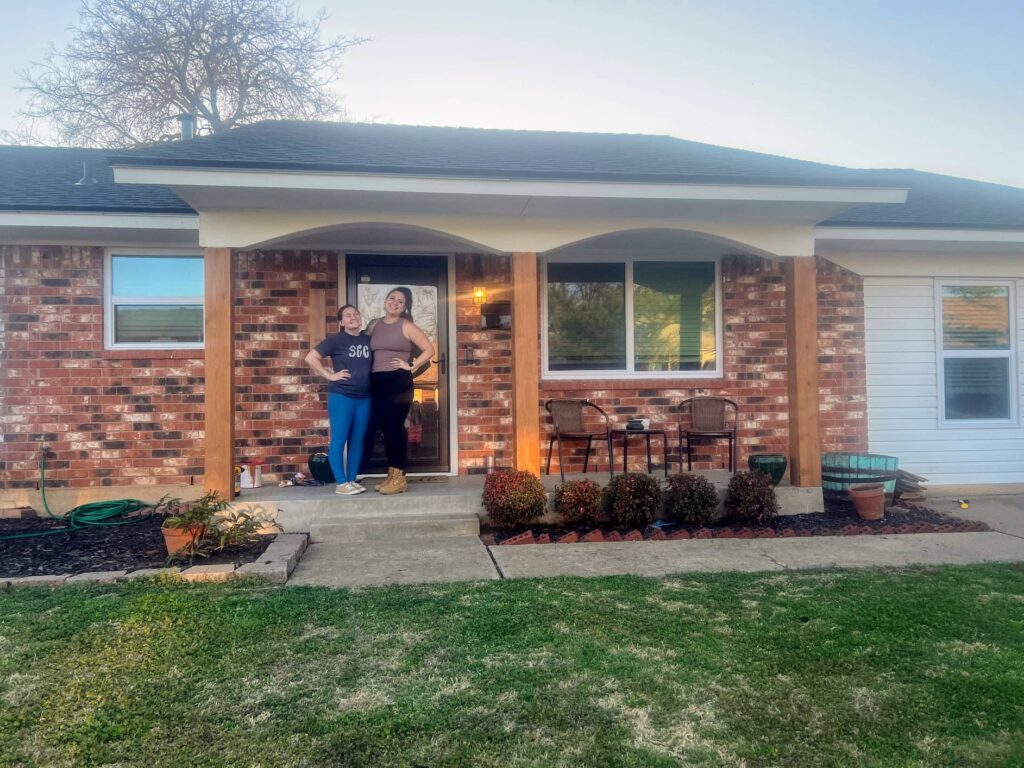
Final Result: Wrapped Front Porch Posts
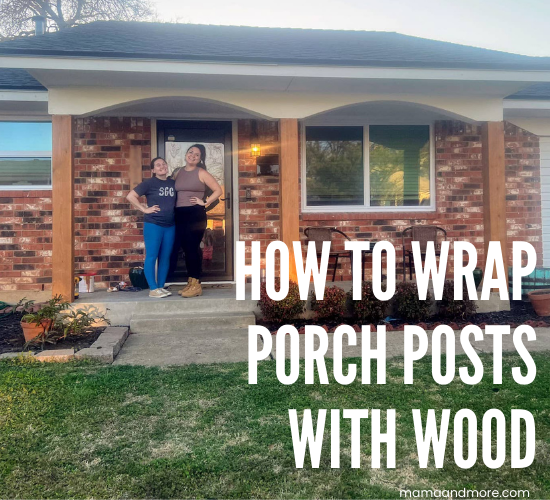
Can you believe what a difference these pieces of wood make for this home’s exterior?!
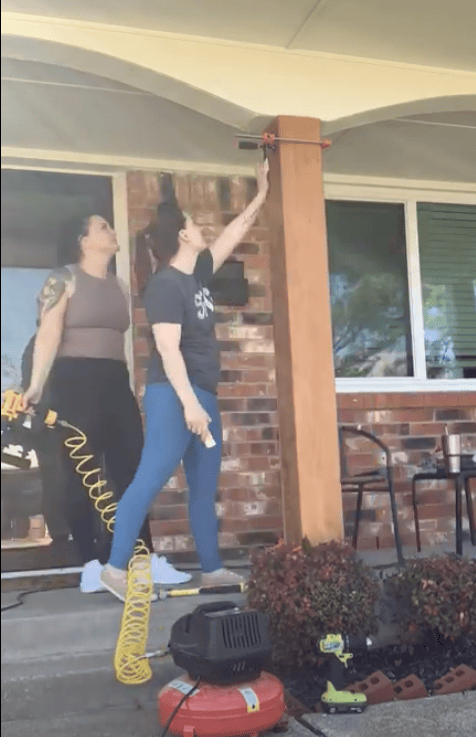
And here’s me and Jan with her beautiful new front porch! In one day, Jana used a miter saw and a nail gun for the first time, and by the end of the day she was an absolute pro. 👏
Related: Want another way to make your home reflect YOU–for insanely cheap prices? Check out my printable wall art on Etsy in the Black Door Shop. You can even get 20% off your order with the code 20OFF. 🙂
If you’re considering doing this with your front porch posts, don’t hesitate! Let me know what other questions you have on Instagram or TikTok. I can’t wait to hear from you 🙂
More related posts: