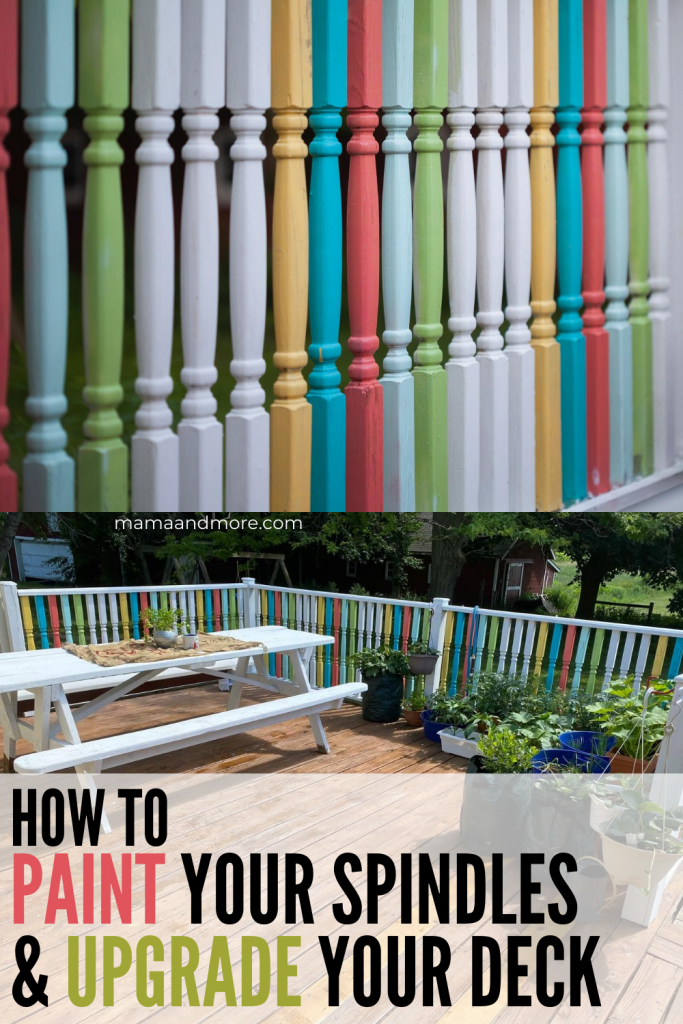
This is a guest project, written by Kaylee (yours truly), but done by an incredible and crafty friend. If you’ve been wanting an easy and affordable project to upgrade your deck, read on to learn how to spray paint spindles different colors.
- Why you should paint spindles
- Supplies you need
- Planning how to paint your spindles
- Prep your deck for paint
- How to spray paint spindles different colors
- Time commitment of spray painting spindles
Related: Want another way to make your home reflect YOU–for insanely cheap prices? Check out my printable wall art on Etsy in the Black Door Shop. You can even get 20% off your order with the code 20OFF. 🙂

Why You Should Paint Your Spindles
Okay, this is an easy answer. LOOK AT THESE PICTURES.


Guys, I have looked at these picture no less than 30 times in the last few weeks, and I may have even tried to figure out a way we could get a railing in our (very flat) backyard so I could do this.
In Lisa’s words, this really makes your deck “fun and whimsical.” It’s SO unique and beautiful–how can you not be happy when you look at this?! It’s also pretty dang quick, easy, and affordable.
If you wanted to do this project with your own twist, you could use gold spray paint or even just deeper colors. There is basically no way this isn’t going to be AWESOME.
Supplies You Need
- Paint scraper (optional, only if you need to remove chunks of old paint)
- Cans of spray paint–these are the exact colors pictured:
Ocean Mist
Seaside
Coral
Warm Yellow
Green Apple - Plastic gloves
- Paper grocery bag or flat cardboard from an old box
- Plastic bags to cover the ground
PS – I linked out to paint from Home Depot because they frequently do store pickup or curbside pick up and have your orders ready on the SAME DAY. I’m a fan.
Planning How to Paint Your Spindles
First of all, make sure you count your spindles before you go shopping for spray paint. You may or may not also want to plan the pattern of spindles you want. Then you’ll know exactly know how many colors of spray paint to look for.
As you can tell by the pictures, Lisa left three spindles white in between the colors. I think that really makes these colors pop even more. There are a million different patterns you can make on your deck or railing, so you might just want to think about this before you look for paint.
Prepping your Deck Spindles for Paint
The first thing you want to do before you do any kind of painting, especially exterior painting, is clean. For this, Lisa use a pressure washer to clean the deck and spindles and let it dry.
Then, if you have old or chipping paint, you’ll want to use a paint scraper or sandpaper to make it smooth. When Lisa did this, she scraped for about 30 minutes.
Finally, you’ll want to cover the floor of your deck or exterior so it’s protected from the spray paint.
If you live in Oklahoma (where the wind sweeps down the plaaaaains at every moment of every day), you’ll DEFINITELY want to use masking tape or painters tape to hold down your bags.
How to Paint the Spindles Different Colors
Aaaand it’s time for the paint!
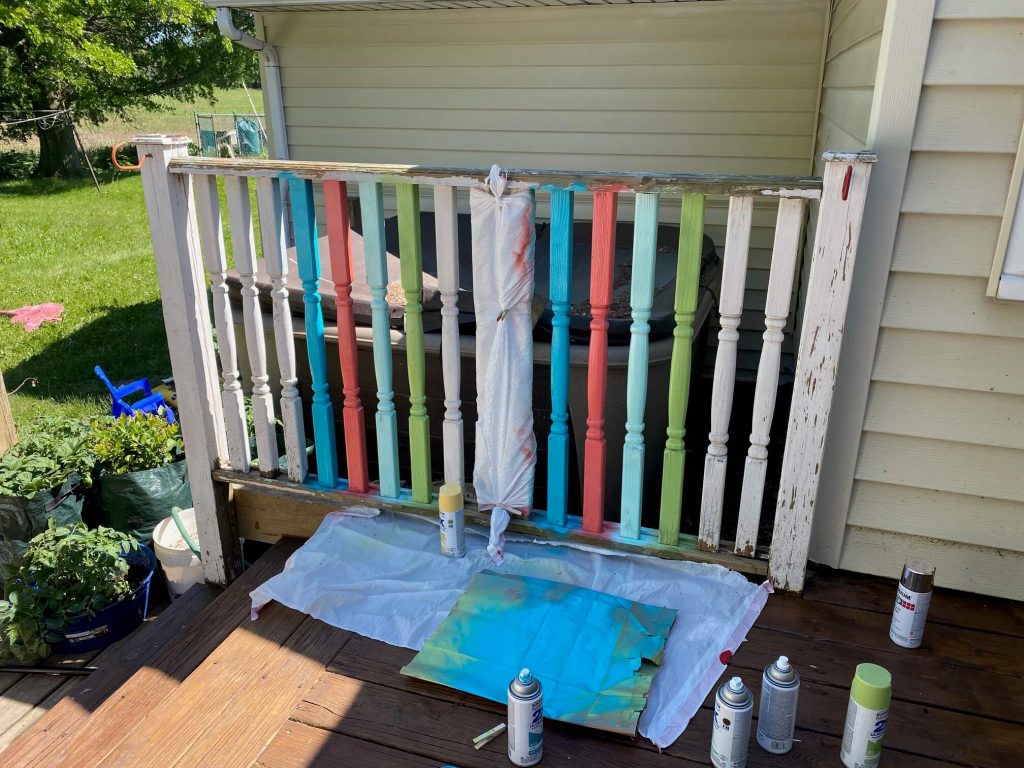
Since Lisa is super smart, she used a paper grocery bag and held it behind each spindle as she was spraying. This blocked the paint from getting on the next spindle.
She also intentionally went in one direction (left to right in her case), so that if little bits of spray paint DID get onto the next spindle, it wasn’t a problem. It just got covered by the correct paint afterward.
She also used one color on each spindle until she was done, instead of switching colors a million times. I 100% think this is the most effective and time-saving way to do this
Touching Up the Paint
When you’re done painting all of your spindles, you’ll probably want to go back with a small paintbrush and the base color (whether your deck is white, black, stained, or whatever) of your railing to touch things up. This is a quick step that will really help everything look finished and beautiful.
A Bonus Painting Tip from Lisa
Seriously: wear gloves.
Honestly, I’ve never worn gloves when spray painting, but since you have to hold the paper bag near the spray, you WILL get paint on your hands during this project.
And this paint will NOT come off your hands easily. Here is Lisa’s hand WEEKS after spray painting:

She eventually took steel wool to get the paint off. STEEL WOOL, y’all.
I am not that dedicated. So just wear gloves, okay?
The Time Commitment of Painting Spindles
Lisa has four children. Lisa is smart. Lisa does projects in pieces. Because she’s smart.
Seriously, two of Lisa’s kids are under 4, very close to my own kid’s ages. This IS how you get projects done.
In her time estimate, this project from start to finish took about 6 hours. She got it all done in half an hour chunks before her littles woke up in the morning or after they were in bed.
Like I said: Lisa is smart.
(Psssst, if you want more info on how to do DIY projects with little kids and no help, I got you. Click that link.)
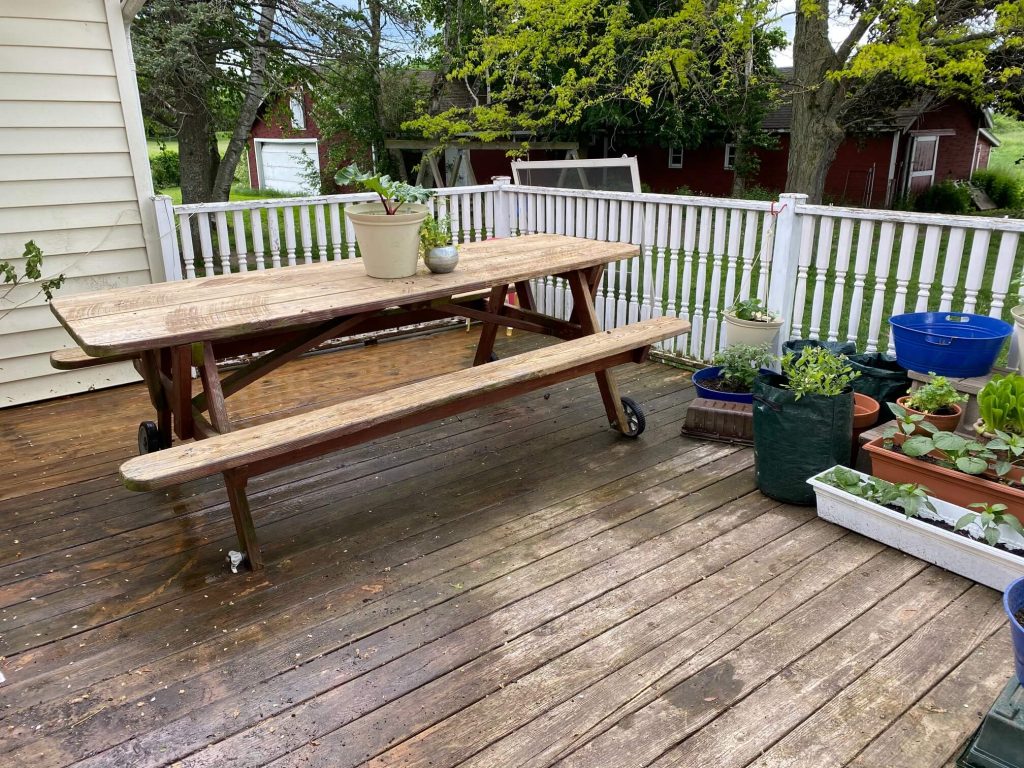
Now let’s take a gander at the before and after, because that’s everyone’s favorite part, isn’t it?
Before:
After:
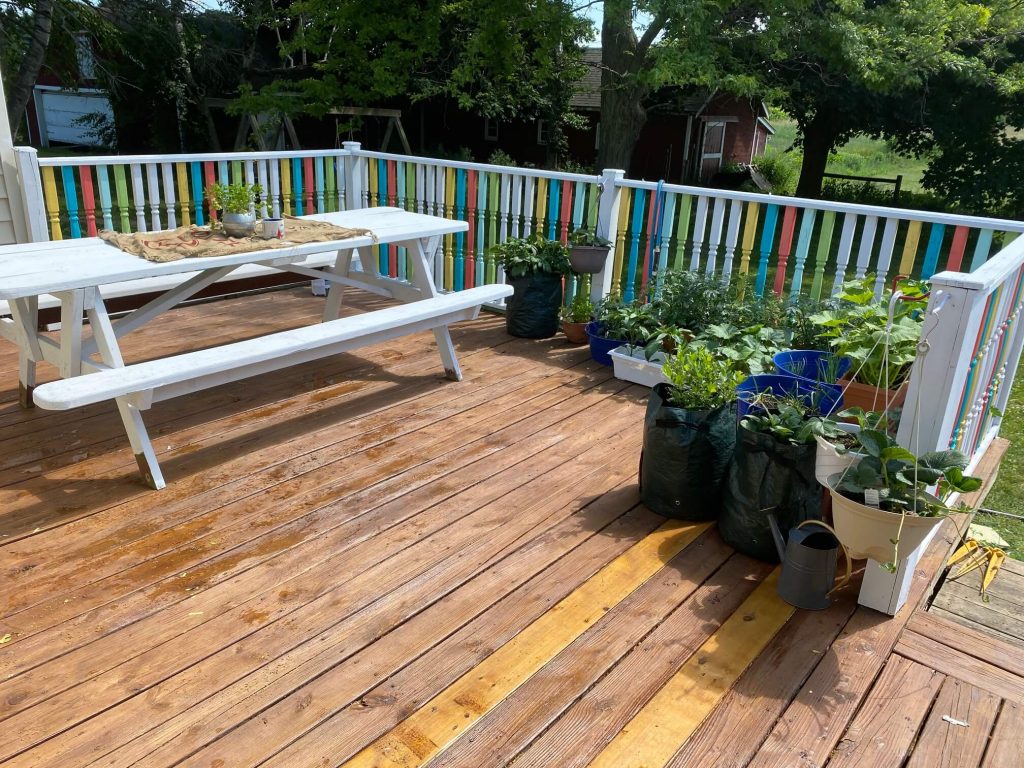
Before AND after:
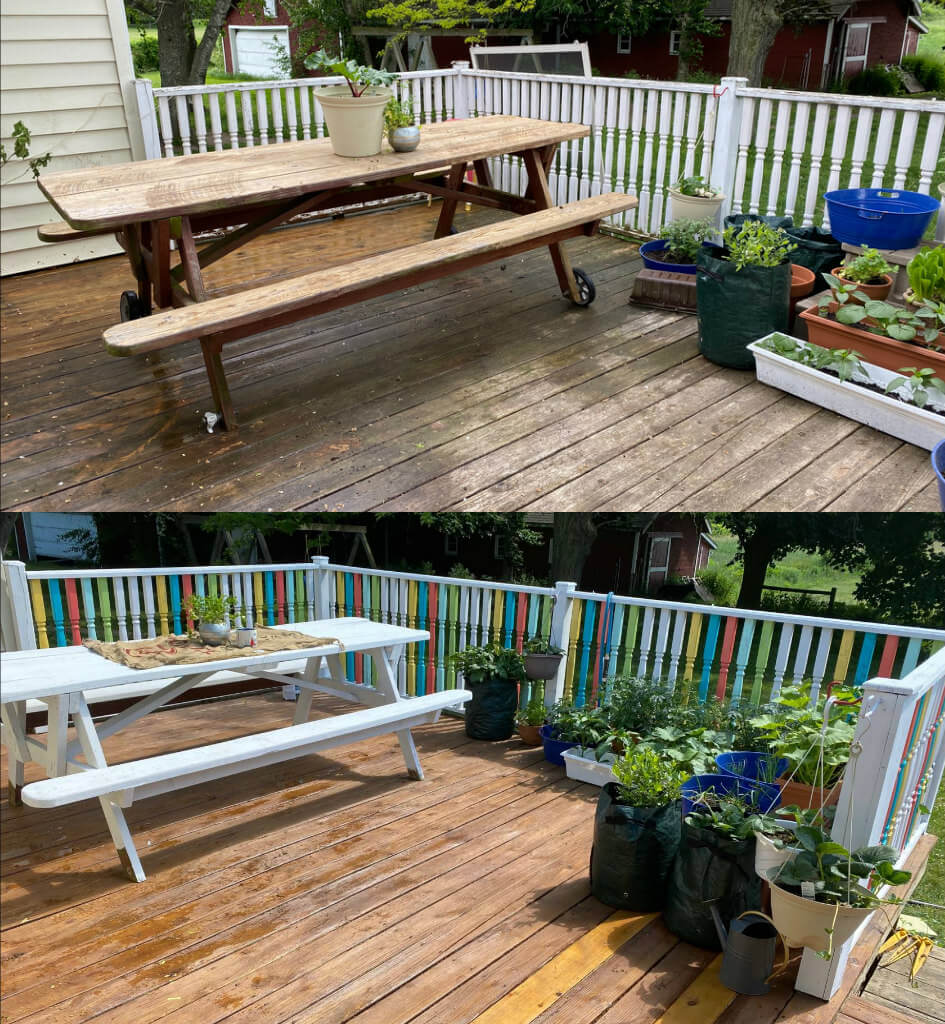
To give credit where its due, Lisa’s mom gave her this idea. Round of applause, Lisa’s mom, because this is one of the best ideas ever.
More Important Info

So this awesome and beautiful friend of mine is also one of the best photographers I’ve ever seen, and she makes some of the most beautiful cards on Etsy from her photography. Seriously, go check it out.
If you’re in upstate New York, you can also follow her Facebook page. But only if you want to frequently think, “THAT IS SO GORGEOUS OH MY GAAAAH.”
Because that IS what will happen. You’ve been warned.
I LOVE seeing you tag me on Pinterest or Instagram or emailing me when you try my projects–so if you try this one, let me know!


