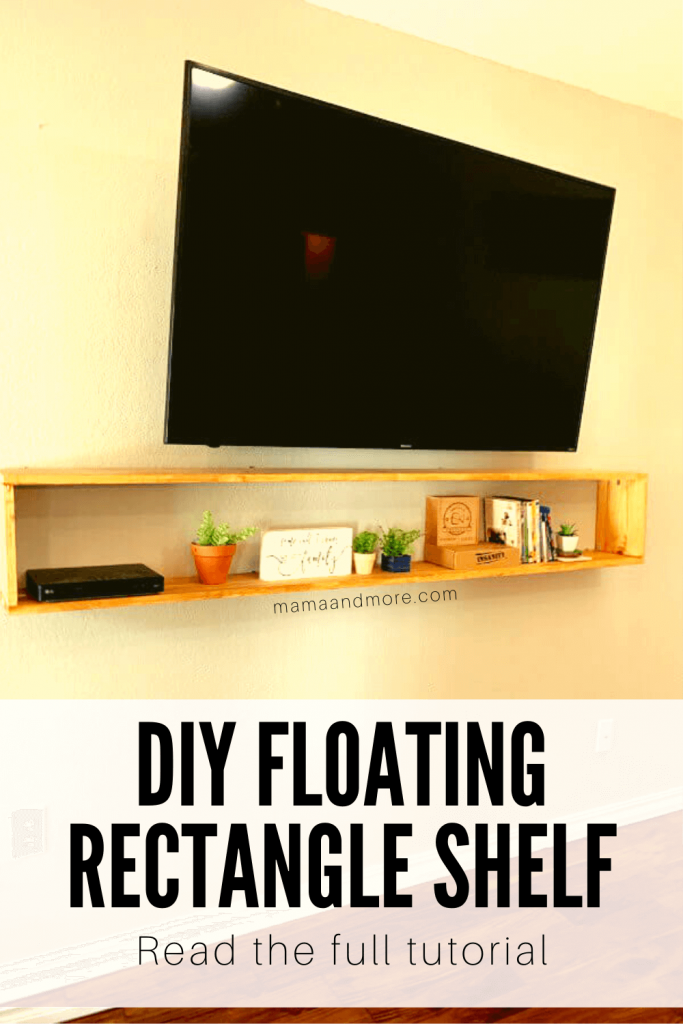
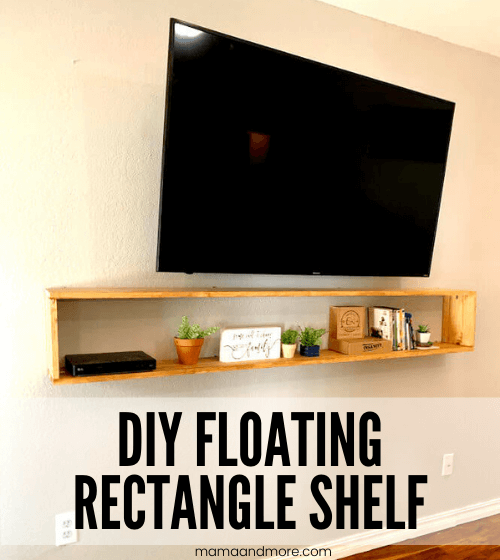
Floating shelves are all over the internet. You can make so many different sizes, shapes, and colors of floating shelves or rectangle shelves to fit your space. In this post, I’ll walk you through the steps to easily build a floating rectangle shelf to add some beautiful and FUNCTIONAL awesomeness to any room.
Related: Want another way to make your home reflect YOU–for insanely cheap prices? Check out my printable wall art on Etsy in the Black Door Shop. You can even get 20% off your order with the code 20OFF. 🙂

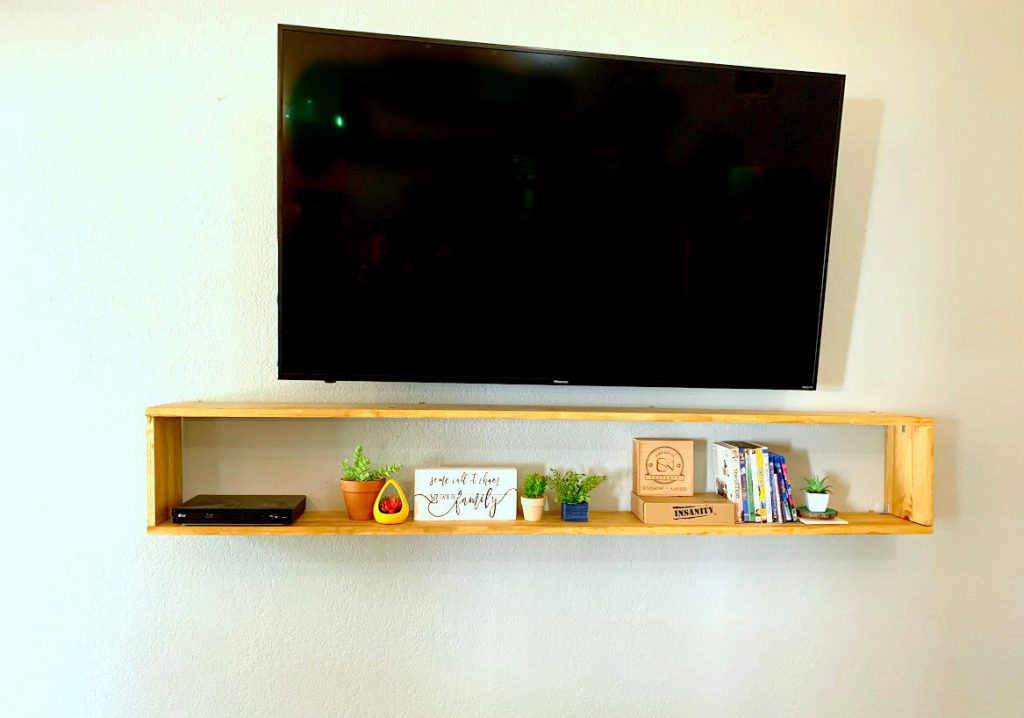
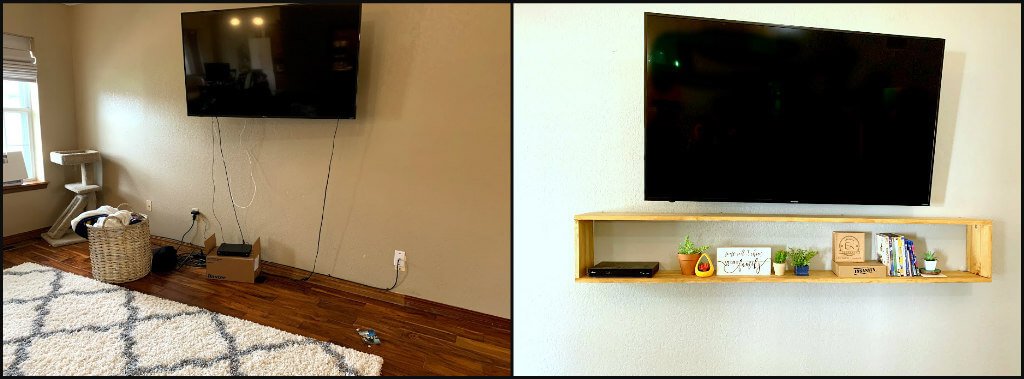
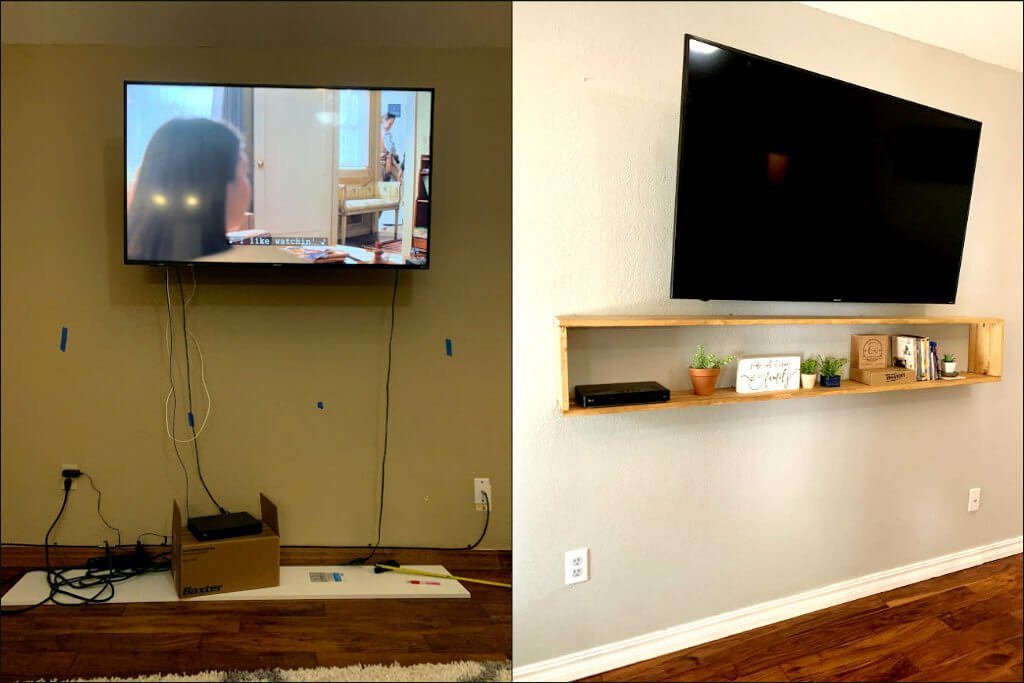
I made a rectangle shelf as our TV stand. I really didn’t want to get a full TV cabinet, but this mess of cords and DVD-player-on-a-box just wasn’t going to do it for me.
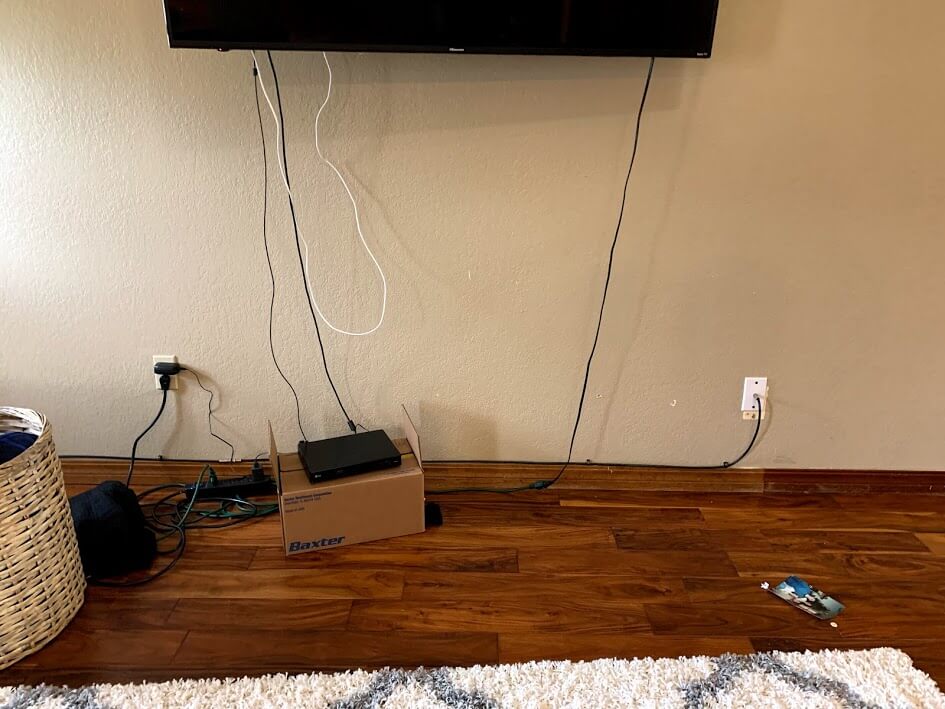
PS, I did this project before I painted our trim and 16-foot living room walls. You’ll see the improvement in the after pictures!
Here are the steps to make a DIY floating rectangle shelf:
- Measure for your shelf
- Cut wood to size
- Check the wood size
- Sand and stain wood
- Attach wood pieces to make your rectangle
- Put anchors and corner braces in your wall
- Attach your rectangle shelf to the braces
Tools and Supplies for your DIY Rectangle Shelf
Need more details on the best tools & supplies for your projects? Check my Incomplete List of the Best Tools & Supplies for DIYers. It includes ONLY tools & supplies that I’ve personally used and recommend, plus some honest notes about each product and what you really need (and don’t need).
- Wood (I used two 8 ft x 10 inch x 1 inch boards)
- Wood screws (these are for attaching the wood pieces, so make sure they are the right size for your wood thickness AND the right size for your corner braces)
- Corner braces and included screws
- Wall anchors (This is the kind I usually use, just choose the size screw that will fit in your corner brace)
- Drill
- Level (any size can work, but a longer one will be helpful)
- Pre-stain wood conditioner (This REALLY helps your stain go on evenly)
- Wood stain or paint with primer
- Stud finder
- Finish nails and hammer (optional)
- Orbital sander (very optional)
- Corner clamp (optional)
- Circular saw (very optional–but this is the one I have and LOVE) or Jigsaw
- Drill extension (optional, but incredible and WORTH IT)
That may seem like a lot of supplies, but the hardest part of this project by far is the measuring. Stick with me before you rule this out as “too complicated.” It’s definitely not!
Step 1: Measure for Your Rectangle Shelf
Measuring is always important and necessary when you’re building things with 90 degree angles–and, like, it DEFINITELY is here.
You need to find/decide:
- How thick you want your shelf to be–I chose 1-inch wood, which is plenty sturdy
- How long you want your shelf to be
- How deep you want your shelf to be
- Where your studs are & where you’ll place the rectangle shelf
The shelf I made it pretty big, so I attached it to studs in six different places. You may not need to cover THAT many studs, but you will need to attach it to at least one stud, and most likely two studs.
Before you go buy your wood boards, you’ll have to do a little bit of math with your ideal shelf size.
The easiest and cheapest way to make a rectangle shelf is to buy two boards and make one cut on each. That way, the cut piece of your board becomes the side of the rectangle.
I don’t feel like that description was clear enough, so I drew you this extremely poor diagram:
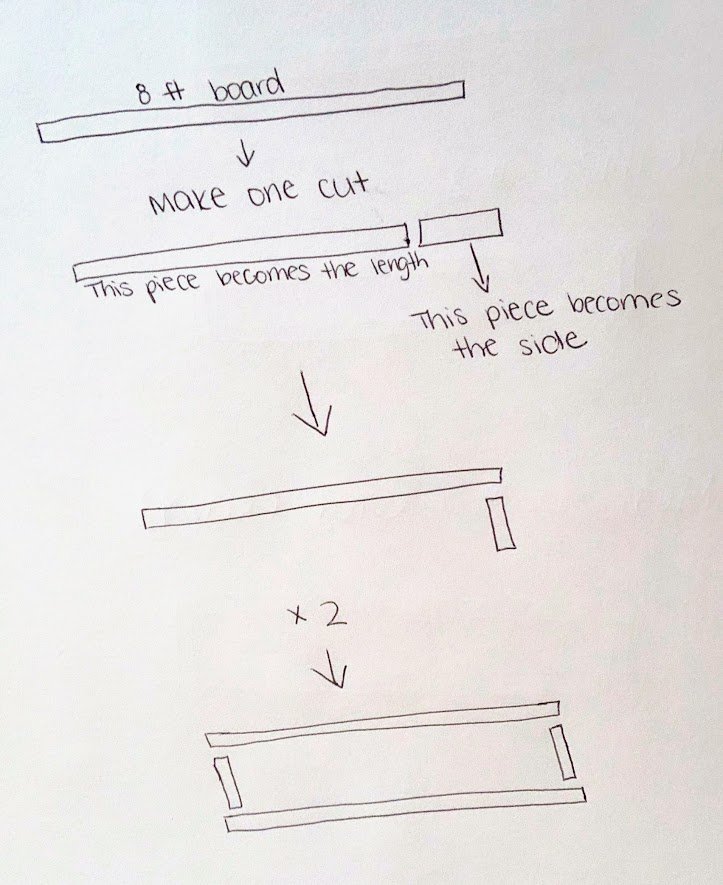
Make sense? If it doesn’t, drop a comment below so I can clarify.
Step 2: Cut Your Wood
You can cut your wood at home if you have a circular saw or jigsaw, but you can also get it cut at Lowe’s or Home Depot. I’ve gotten SO MUCH wood cut there, and no one has ever charged me.
If you decide to get it done at the store, just make sure you know your measurements beforehand.
Step 3: Check the Wood and Rectangle Shape
Now that your wood is cut to size, set your rectangle up on the floor to make sure it is the right size and that everything fits.
I know it seems like an insanely simple step, and it is. But it’s SO important–you don’t want to move forward and then find out that something was wrong with the wood.
Now, there are a few ways to assemble this shelf. I don’t think there’s any difference structurally in the way you do it, but it will impact the exact length and depth of your shelf.
Since I’m obviously so great at drawing sloppy diagrams, I did it again:
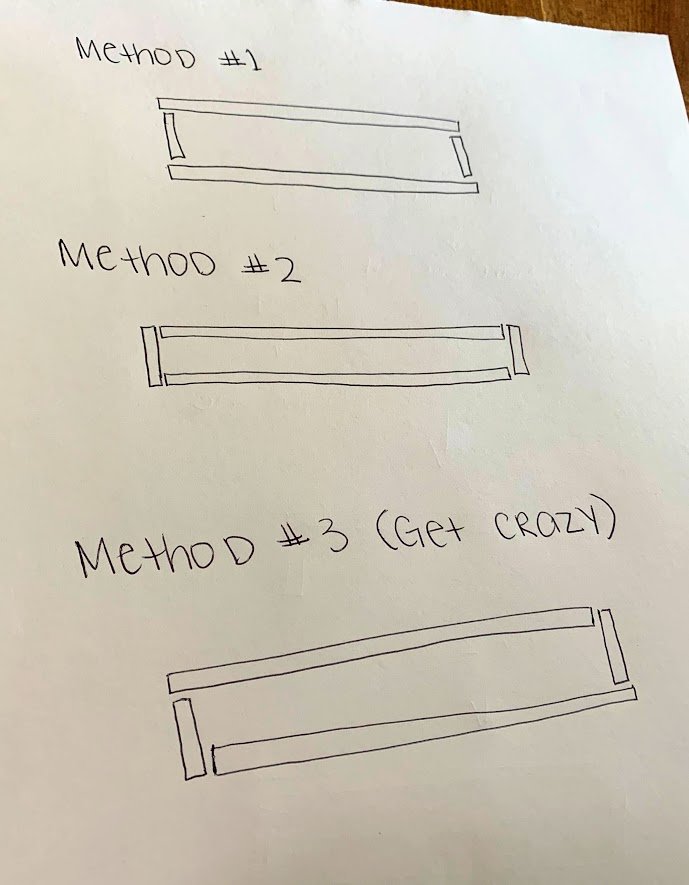
I used method 1, but not for any particular reason.
I don’t recommend method 3, just because it seems like it unnecessarily complicates things–however, if that makes the most sense to you, go for it!
Step 4: Sand and Stain Wood
Whether you stain or paint your rectangle shelf, you definitely want to start with sanding.
I recently got an orbital sander, and it’s pretty life changing. It makes this sanding process SO quick and efficient (and dare I say… fun?!)–however, I did not have a sander when I made my rectangle shelf. So you will do just fine with some sandpaper and elbow grease.
[Quick note: I hate the phrase “elbow grease.” Like, who thought of that?! I’ve never put grease on my elbows, and when I’ve had to do some intense sanding, I never think, “Wow, this is really hard on my elbows.From here on out, I’ll never use that phase again. It’s just not natural. Deal? Deal.]
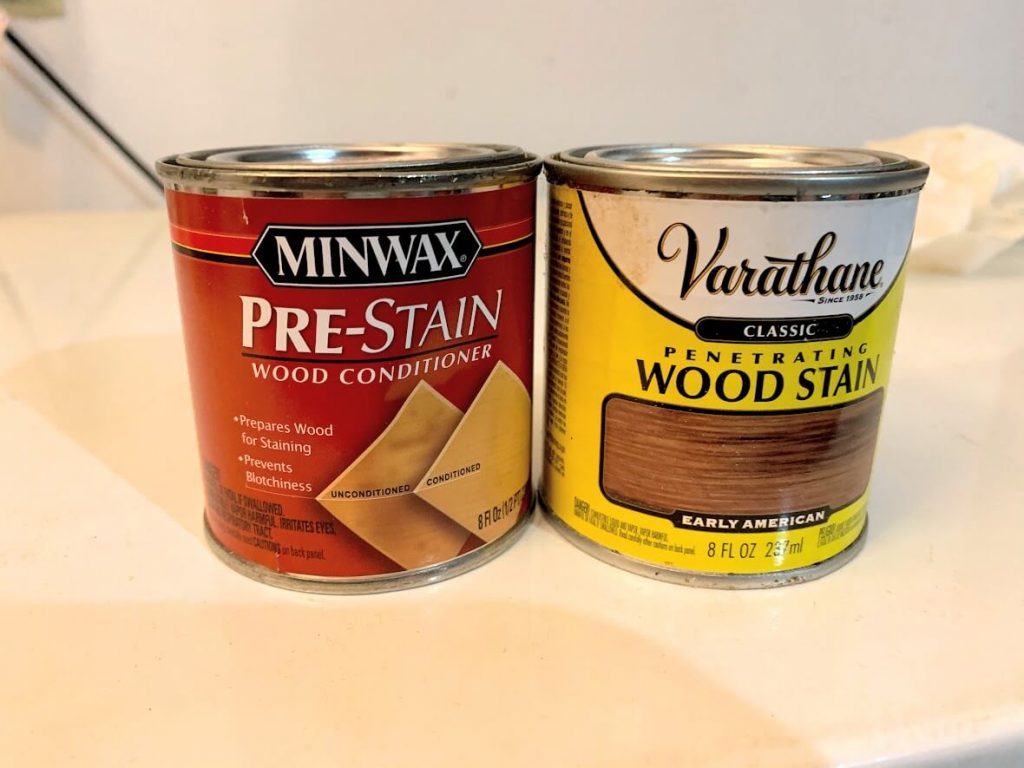
After you sand, I highly recommend using pre-stain conditioner. I never used to use it, but when you’re working with pine (which is almost always what I’m working with)–it really does make a NOTICEABLE difference in the evenness of your stain. It’s also only a few dollars.
As for my stain, I used Early American. You’ll see that the end result is very light, which is pretty in style right now.
Step 5: Attach Wood Pieces to Make Your Rectangle
Okay, your wood pieces are sanded, stained or painted, and READY. It’s time to put them together.
This is where a corner clamp would be FABULOUS. I still don’t have one, so I went without.
If you don’t have a corner clamp, it would be extremely helpful to have another person hold the pieces together. I’m also too stubborn for that, sooo I didn’t do that either. But hey, if you have a willing person, do it!
To secure your pieces together, you just need to drill a small pilot hole, then use one of your wood screws to attach the pieces.
Using wood screws is extremely effective on its own. However, I was very concerned about the security of this shelf, so I also did two other things when putting my shelf pieces together.
I used a few nails and hammer–if you do this, just make sure you use finish nails. They don’t have a flat head, so they blend in more to your final result.
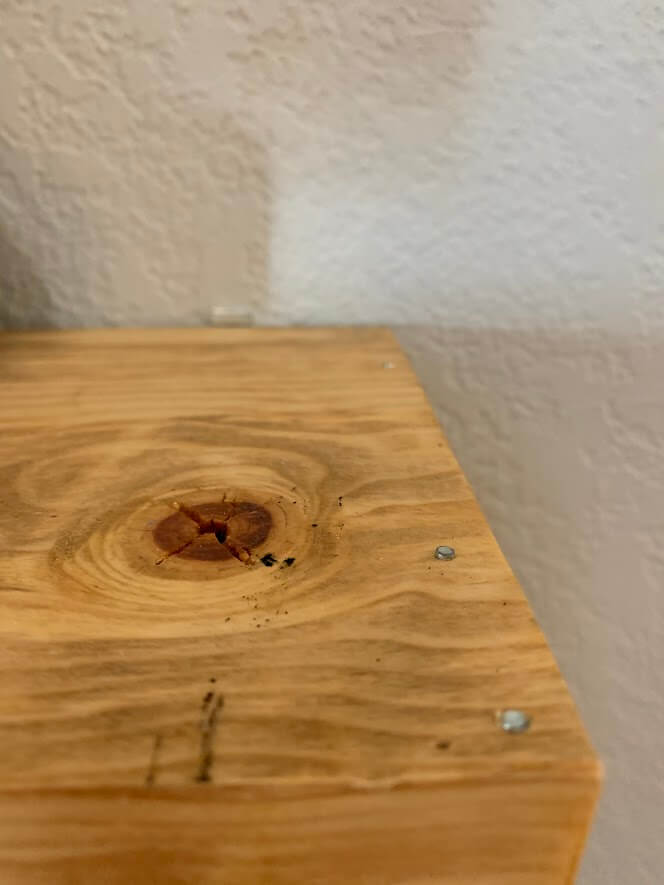
Then, I installed a corner brace on the inside of the rectangle. This is also not 100% necessary, but I do feel like it helped my shelf stay at perfect 90 degree angles.

You’ll notice that my upper and lower corner braces are in different spots… yeah, that was a mistake. If you put the corner brace in the wrong spot, it could end up clashing with the corner braces you use to hang your shelf. So just watch out for that.
Step 6: Install Anchors and Corner Braces in Your Wall
Now, the next step is the key to installing your rectangle shelf in a way that makes it look like it’s floating.
These little guys are so powerful.
First, mark where each corner brace is going to go. It’s SO IMPORTANT to make sure that your marks are level, and that you know where your studs are.
Take your time marking these with your level–it will save you SO MUCH TIME and frustration later.
Once you have your marks, drill a pilot hole big enough for your anchor. Insert your anchor into the hole, and then use the answer screws to attach the corner brace to your wall.
It will look like this:
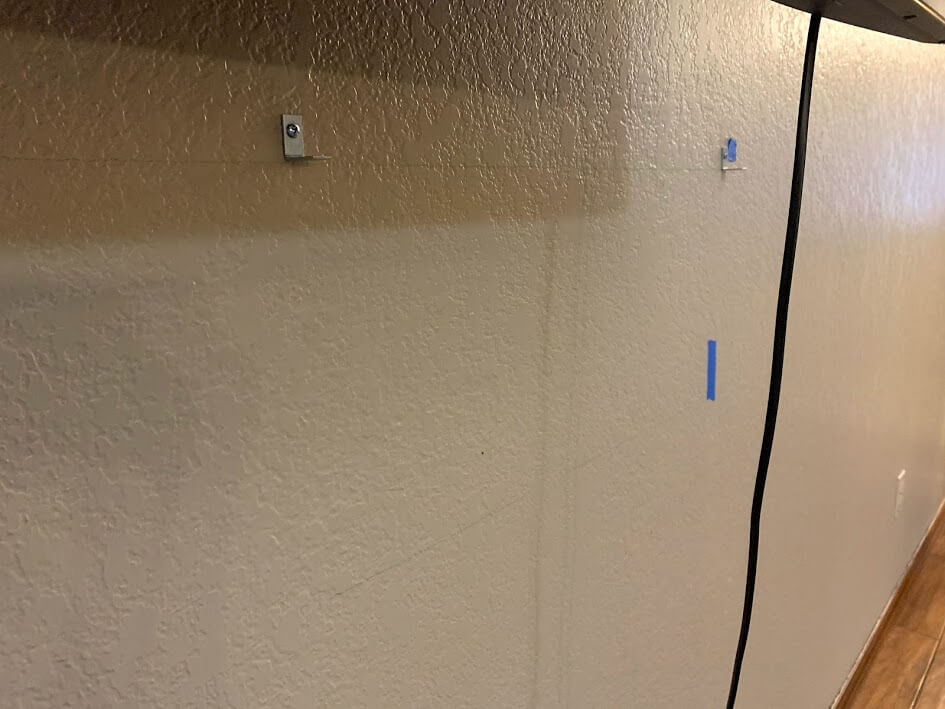
Again, check that your corner braces are level even after you install these! I frequently lifted my rectangle shelf and sat them on the braces to make sure that they were all contacting the shelf and everything was… you guessed it!… level.
Just a note–the picture above is from just the TOP set of corner braces I attached. I also attached corner braces to the shelf and to studs along the bottom.
I 100% recommend attaching your rectangle shelf to studs at the top and bottom.
Step 7: Attach Your Shelf to the Corner Braces
The last step is probably the easiest!
Lift your rectangle shelf up, sit it on your corner braces, and then use the corner brace screws to attach that thing! If your rectangle shelf is as large as mine was, you will need someone to help you hold it up.
This is where the drill extension comes in handy. Your rectangle shelf might be deep enough that you can easily fit your drill–but mine wasn’t.
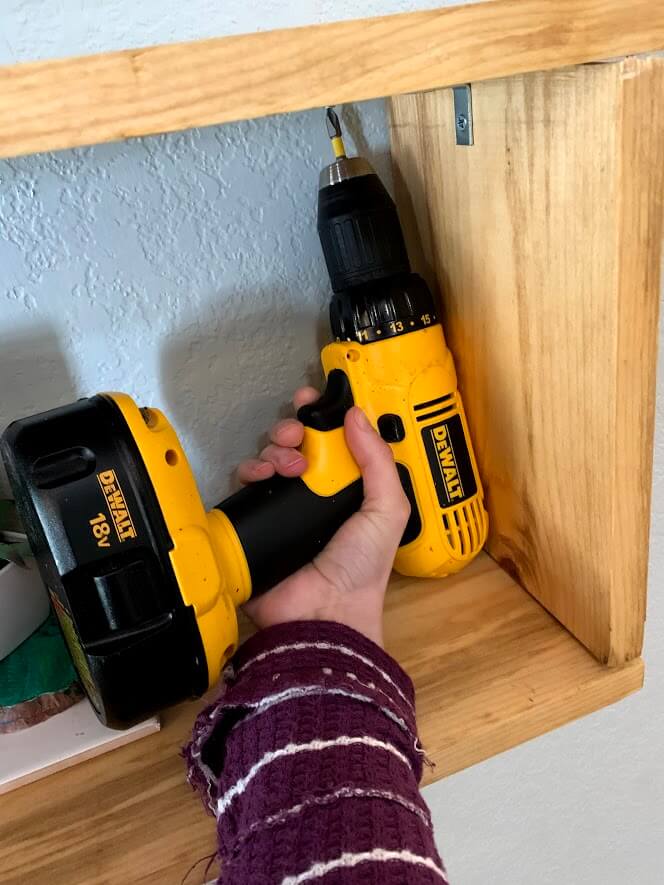
This is how it fit with the screw all the way installed. Before the screws were in the wood, it did NOT fit well.
But when you use the drill extension, it makes it super easy.

I always give you the optional supplies because I don’t want you to spend more money than you need to. However, this drill attachment has saved my sanity so many times–I 100% believe it’s worth the price.
Final Step: Show off Your Floating Rectangle Shelf!
Once you’re done, send me a picture on Instagram or in the Facebook group! I LOVE to see when you do my projects.
Here are a few other posts you might like:
How to Build a DIY Hanging Rope Shelf
The Lazy Guide to Reupholstering a Couch
All the Best Tips for Selling on Facebook Marketplace
DIY Hanging Fruit Basket
